Hello again Friends!
November has been really exciting with all the beautiful artworks from my new Creative Team.
Grab a cup and spend a moment revisiting these inspiring posts: Athanasia's vintage art journaling, Gayle's 'tendrils' of excess thought assemblage, Karolina's textural queen bee, Kasia's nostalgic canvas, Kassa's vibrant vintage girlies, Marta's journaling in 3D, Sanda's mysterious fossils and textures.
Aren't they all amazing?! I'm feeling really lucky and grateful to be supported by this bunch of talented Artist!
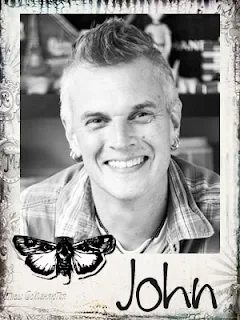
Last post this month belongs to John - a grand finale to our month of introductions. :) I have a feeling you will absolutely love John's creation - enjoy!
Because I work in a variety of different mediums, I like to refer to my art as "mixed media fusion" where I can combine my love of building colors and textures with mediums and incorporate it into bookmaking, 3D pieces, jewelry and paper crafting.
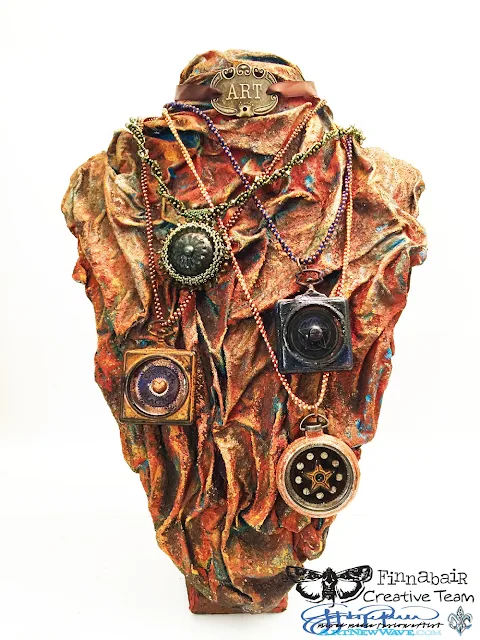
Here's my first project for Finnabair Creative Team - A Rusted Jewelry Display:
Besides using my favorite Prima products for creating projects, I’m always on the look out for objects to incorporate. This is one of my thrift store finds – a blank jewelry display. I couldn’t pass up the price for only $1.99 and knew that I could transform it somehow into something amazing! Here's what it looked like 'before':
One of my favorite Finnabair products that I love to use is the Art Extravagance Sculpture Medium to transform an ordinary object into an entirely new work of art with flowing texture of fabric.
It’s quite easy to use the Sculpture Medium to form and shape fabric.
For this project I used the Neutral Beige Sculpture Medium along with the light weight muslin from the Art Basics Fabric Pack.
Simply pour the Sculpture Medium into a container, enough to fully saturate the fabric because the medium not only shapes the fabric but acts as an adhesive as well. I have found that this is one of the few products that I actually wear gloves while working with just to avoid having to clean my hands.
The beauty of working with the Sculpture Medium is that there is plenty of working time to create as little or as much texture with the fabric. Many times I simply drape the fabric down and let the fabric take its own form and shape.
For this jewelry display I started at the top around the neck and worked my way down to the base, wrapping the fabric around to the back. Once I felt that I had the look that I wanted, I used a heat tool to set the fabric.
I have found that this will set the fabric enough to continue adding paints and other mediums, but the fabric will continue to stiffen up over the next day or two.
Just like real rust on metal, building a beautiful rust color and texture takes a little bit of time.
With a brush, I used the Brown Rust Rust Effects Paste as the base color on the fabric, applied generously. I quickly heat set the brown, which when dried as a beautiful matte finish with a nice texture.
Using a dry brush technique, I then began highlighting areas with the Black Berry Art Alchemy Metallique Paint. Once dried, I highlighted with Art Ingredients Rust Mica Powder using my finger.
With the base coat applied, now the rusting of the fabric could begin! For the next layering of color, I applied the Red Rust Paste with a brush randomly to add more color and texture then heat set.
Once dried, I first highlighted areas with Metallique Emerald Green followed with Metallique Turquoise paints to create a funky green/blue contrasting rust color and then heat set.
Using the Yellow Rust Paste, I highlighted the fabric to give even more rust color and additional texture. In some areas that I felt had too much lighter colors, I simply added a little Brown and Red Rust Effects Pastes.
I could spend hours creating different color combinations and building textures – it is quite addictive! To add a little more metallic shimmer and highlights, I randomly applied Copper Mica Powder.
Using the Rust Effects Paste on fabric brought a completely different finished look to this project with just the right amount of texture that didn’t overwhelm the fabric.
Normally I would incorporate a variety of different Mechanicals into my projects, many times using texture paste as an adhesive to hold them down.
Since I want the jewelry that will be displayed on this piece to be the true focal point, I decided to only use one of the Mechanicals from the "Plated Labels" set around the neck of the bust held into place with a piece of brown satin ribbon.
I’m beyond excited at the results of this project and how it is the perfect background for my completed jewelry pieces, like this one which was colored using Metallique acrylic paints and highlighted with Green Mica Powder before being set with resin to complete the cabochon that I then beaded around to create this necklace.
I hope this project has inspired you to get creative with Sculpture Medium with fabric, or even creating your own stunning projects using the Rust Effects Pastes.
Always remember to share your projects with ALL of us for inspiration on the Finnabair & Friends Open Studio Facebook page or use the #finnabair hashtag on Instagram!
Until next time!John
Products used:


8 comments:
so very cool! I love the layers of color! it's gorgeous TFS
Wow!! John, you are so inspiring!! This is so cool!
Wonderful John.
I have just bought the finnabair rust paste and cant wait to use it. The colours and textures are stunningly beautiful. You just want to stroke it!!!!
Fabulous, fabulous, fabulous.
Lovely project.
Lisa xxx
This is so cool and unique John. Really a one-of-a-kind. Love it!
Fabulous display and detailed description of progress.
I want to buy Relic 1 but it keeps throwing me out. Can you help me? I don't have a pay pal account.
Nanci, where are you trying to shop?
Fabulous project, John! Love how you transformed the fabric, and I am always drawn to rusty textures - yours is amazing!!
Post a Comment