Showing posts with label France. Show all posts

Friday, 30 June 2017

Ambassadors' Product Picks

Hello my Friends!
We are right in the middle of 2017 and what a half of the year it has been for me...
This time has been filled with classes (including my very first 'Imagine' online class with Everything Art!), LOTS of traveling and teaching in all the corners of the world, inspiring meetings and new experiences... Im sure some of you could see me in person, some may follow my Instagram and FB - so you could see how busy it really was! Every ay I will repeat - I'm blessed with the chance to do what I love, the most rewarding job I could ask for - encouraging people to be creative and to spread their wings... Thank you so much for making it possible!
And also: brand new Finnabair products that saw the light of day. :)
I'm so proud to be seeing so many of you enthusiastic about my Art Alchemy Waxes, new lines of Acrylic Paints (including Sparks and brand new Impasto Paints), new Mechanicals, Art Stones, Patina and Stone Effect Pastes and also my own special Apron & Sleeves! :)
Today I'd like to leave you with my superbly talented Brand Ambassadors who kindly agreed to meet again and talk about their personal favorites among my products and present some of their gorgeous artworks to inspire us all!
Their creativity knows no limits....


Art Alchemy Waxes.
Though at first I wasn't convinced, they slowly became my favorite of the year: the Waxes!
I'm not much of a bling girl and considering all the wax colors contain shine to them, I had to tame them, learn to know them and most of all, discover ways to make them work within my universe.
But once I got there, the result just made me swoon. And as they do smell so nicely, you just want to leave them on your table! ;)
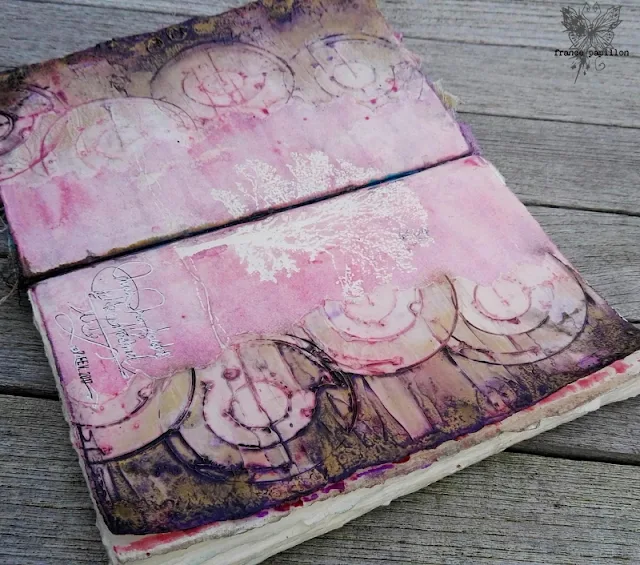
This project is one of my Journal on Monday videos, it's called 'So emotional'. Unfortunately... I completely forgot to turn the camera back on when working with the wax... Like I said, they make me swoon! So you can see the whole page come together, except for the wax part, right here. :)


I LOVE color and contrast.
I work a lot in muted colors; lots of browns and blues. But highly intense color outlined in black always grabs my eye.

You cannot dilute down the color in these great paints with water. The color remains intense.
But the thickness is great for complete coverage on almost any project. I used a bit of water here to make them glide on easier into tiny spaces, but as you can see, the color is still great. And the black used to outline or edge the colors really makes the colors pop.

Read more about my Paintbrush Doll on my blog.


Today I would love to share with you my creative love of using one of my favourite new release products: Art Alchemy Metallique paints.

For the project pictured below I have used the new release ‘Dark Forest’ green.
What is to love about the Metallique paints?
Well, for me it is the fast drying and waterproof properties I get when using them to finish my air-dry clay projects. Because I don’t have access to glazes and a kiln I use the Art Alchemy Metallique products because I can emulate and/or reproduce the finish and look of a glaze, with the added bonus of being water repellent.
Above is a picture collage of a quick little project I created just for fun and shared on my Instagram account. It shows a small air-dry clay pot, that I coated in Metallique paint. When it was dry I potted it up with some small cactus pups. [The cactus will survive for about 6 months before I have to re-pot them, and for now to water them, I just use a pipette].
These next two photos show 2 air-dry clay bowls that I created and finished with 2 of the fabulous first release Art Alchemy Metallique paints.

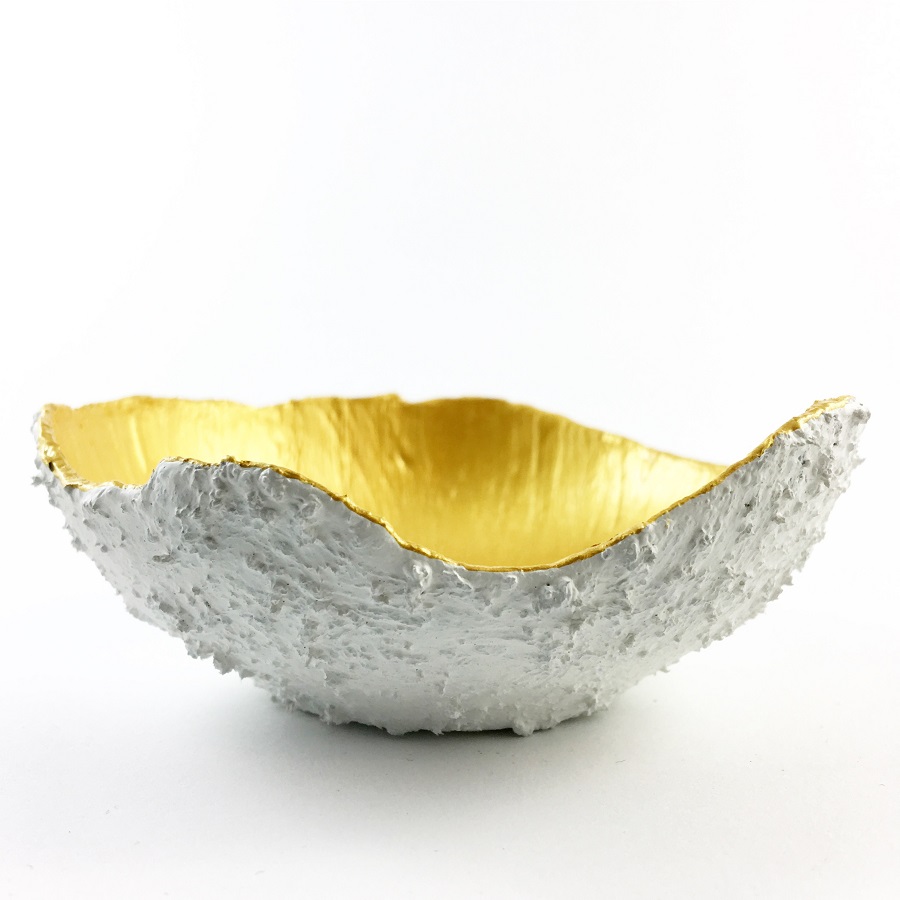
The first bowl I have used the Metallique paint on both the inside and outside of the bowl.
With the crackled finished it was used to highlight the cracks. It is important when creating this effect to work fast, and to use a moistened cloth [I used a baby wipe], to buff off [remove] the Metallique paint as it has a ‘fast drying’ quality.
With the second bowl I used the Metallique paint on the inside surface.
When I use the paint as a colour or finish coat I like to ensure that the clay surface is first under coated with Art Basics Heavy Gesso. The outside surface effect of this bowl was achieved by using Stone Effect Paste and Heavy Gesso.
So... what is not to love about Art Alchemy Metallique Paints?!!! :)
The products that totally stole my heart in 2017 are the Art Alchemy Waxes.
They work perfectly on both light and dark surfaces making every kind of project look spectacular highlighting chosen details.
They are really subtle and very easy to apply + they smell delicious... :)

I usually like to apply the Waxes with my fingertips - this allows me a better control of where they go; I use a little paintbrush for the spots that are harder to rich.

My personal number one is Metallique Wax in White Gold! :)


Art Alchemy Sparks Paints.
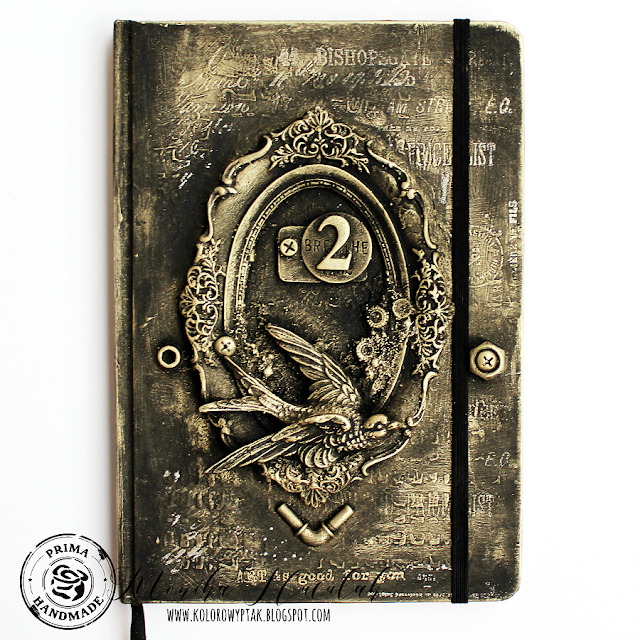
So hard to pick one product as my favorite! I mean they all are awesome - new colors to the wonderful Art Alchemy paints, the new Impasto paints, bigger jars of Rust and Patina sets... But I really, really like Sparks! The magpie in me goes crazy when I see their shine and shimmer!

My tip to using them would be to mix in some matte in the same project to really show off the shine. What I usually do, though, is mix the Sparks with Art Alchemy paints so it's shine all the way!


I've used these paints in numerous projects of mine: Heart of Gold, this Sparks card, the Carpe Diem journal cover and many more - they are simply always on my desk. :)
P.S If you're anywhere near Helsinki, there's a great opportunity to meet Riikka in person during one of her live classes in August!

Aren't they ALL amazing?
I'm glad that I don't have to pick my favourite products from my latest releases as I truly love them all, and watching my Creative Team, Ambassadors and you all creating with them makes my heart flutter and sing! I keep checking Instagram for new, inspiring projects on the daily basis - so if you'd like to show me projects you are proud of - don't forget to tag me! It will be much easier for me to find you and your beautiful art!

Friday, 26 May 2017

Ambassadors' Meeting - Simplicity

Hi there Friends!
I hope you didn't miss the big news about my products hitting the shelves in Michaels stores in USA and Canada! It's such an amazing feeling and I'm really thrilled to be finally sharing this news with you - I hope more of you will have the possibility to reach for my products - all made with so much love! ;)
Getting ready for the Michaels launch, we talked a lot about simplicity - creating artworks that are not intimidating, with ideas and instructions that are easy to follow and encouraging for beginners and inspiring for people who already know mixed media well.

It really got me thinking and I asked my super talented Brand Ambassadors to join in the fun. :)

This month we are discussing Simplicity.

Each of the Artists will confess if it's their style or maybe they express themselves more freely when things go 'complicated'. ;)
My Ambassadors are sharing their thoughts AND each of them presents a beautiful piece they created that best illustrates the theme WITH some really cool tips and tricks. You'll love this post to bits! :)

*   *   *   *

Whenever I want to keep it simple on my spread (which is more often than not), I like to start with some Modeling Paste. Either over a stencil or spread on the paper to then stamp in.
Depending on the stencil, the stamp, the colors, the embellishments you add, you can go from something very soft to something very dramatic in no time. Yet the spread still looks simple!

For this first spread, I added Modeling Paste over Finn's Checker stencil.
I added some shades of grey and ochre and my background was ready!
It has a softness to it that allows the embellies to speak for themselves.

The second spread was a bit more intricate. You can watch the whole process here.
Let's just say it all started with some Modeling Paste and one of my stamps :)
 
Texture is, to me, the most intimate way to express myself in my art journal, because of, among others, the diversity in effect it offers. So I guess modeling paste is one of my best friends!
How about you? Who's your mixed media best friend? :)


I do not create "simple" projects well, but I really admire those people who make them look so stunning.
I always seem to go just a bit too far... but since I continue to add and remove pieces from my projects BEFORE I glue, I can pull back a bit before the final stage.
 
For this simple wall hanging I used 2 plain pieces I found at Michael's, a metal plaque and a resin medallion.
Rust Paste is used directly onto the metal plaque.
The Patina Pastes are added to the resin piece.
A bit of Patina is also added to the tin piece.
Sprinkle in a few Metallic Micro Beads and Mica Flakes and glue into place with Soft Gloss Gel.
The wonderful Heavy Body Gel sets the medallion in place with a thin wooden circle underneath to raise it from the plaque. Done!
Tip: I use a fine tip applicator to put down the Soft Gloss Gel before added my bead and flakes.


For those who know me and my creativity, you will know that:
Simplicity! It makes my heart sing!
Simplicity! It's my thing!
Simplicity! It's my Creative Vibe!

Even with the full wonderful range of Finnabair mixed media products at my disposal I still have a simple/minimalist approach to the design and creation of my projects.
So with that in mind I would love to share with you some recent creativity that I have been sharing on my Instagram account for #the100dayproject.

Black + White + Doodling = Simply Divine.
I have used two of my favourite Finnabair products from the Art Basics range: Black and White Heavy Gesso.
To create these projects I have used either a canvas board or a canvas, however they can also be created in your journal.
I painted the canvas board/canvas first with Black Gesso. Then using a medium sized palette knife, I applied the Heavy White Gesso to the background to create a background head and shoulders profile shape.
Then to complete these funky portraits I used my paint markers to draw and doodle a 'Funky Peep', over the white gesso area.
So what is not to love about Finnabair's Heavy Gesso? I love it and I so loved using it to create my Funky Peeps! Simply Divine!

Me and simplicity are good friends when we meet occasionally. That is to say if I just happen to make a project that's simple.
When it turns simple naturally, then it's good. When I TRY to do something simple... well, that doesn't end well. The project gets annoyed with me and me with the project.
I feel most at home with projects that are not simple. Or they are to me, but I guess they look complicated to others.
I love when creating is simple, just going with the flow, but the end result rarely then is looking simple.

For this Cafe I created a couple of cards that were supposed to be simple. I think I managed quite well! They look fun and are super easy to make.

I mixed some Glitter to 3D Gloss Gel and used this self-made glitter paste through a Star stencil to a piece of transparency.
After drying time I then cut the transparency to smaller pieces and used those in my cards. I also used the same gel to adhere the blooms in place on top of the lace. 
What's great about Finnabair's mediums that they all can be mixed! You can create your own pastes and gels for each project and customize your creations.
Soft Gloss Gel makes a prefect paint base, whereas 3D Gloss Gel is just the thing for a clear texture paste. My tip is to mix and experiment!


I like simplicity.
I value integrity and I like things to be clear and honest.
I like to say and show things as they are.

It laso applies to my art. I think my works are not very complicated - they are easy to make and usually I don't use too many supplies to make art.
It's rather HOW I use them and how creative I am with the products that makes my pieces special.

Today I'd like to show a very simple trick with just 3 products to create some interesting effects! I hope you'll like it.


First, I covered a tag with Black Gesso and after it dried, I took a Weaving stencil and added one more layer of Gesso.
I used 3D Matte Gel to glue my embellishments, this gel is simply the best supply for that.
Then I covered everything with Black Gesso and then added some highlights and accents with Art Alchemy White Gold Wax. I applied it with the tip of my finger and with a little brush to add it in places I couldn't reach. Done! Nothing more simple!

I hope you liked today's meeting with my wonderful Ambassadors and found it inspiring.
I'm so curious whose ideas are the closest to yours and you own artistic process - leave a comment - we'd love to hear from you!
And now - whether you're into clean & simple or more complex forms and styles - we hope you have a great creative art filled weekend!
Finn & Team

Saturday, 4 March 2017

Ambassadors' Meeting - Emotions in Art

Hi there Dear Friends!
My super talented Brand Ambassadors did it again!
This month I've asked these eight amazing Artists to share their thoughts on emotions in art and how they impact their creativity.
Their answers were most interesting and even though emotions play a different role for each of the ladies, the whole Team agreed on one thing - art can be highly therapeutic and is their go-to mood booster.
I'm sure you know the feeling. :)
Enjoy this inspiring post and we hope you will also share your own thoughts - feel welcome to do so in our Finnabair & Friends Open Studio facebook group!


Do I only create when in a happy/positive mood?
I am glad to say that I am rarely in a bad mood. :)
And especially the moments while I'm creating my art - feeling sad is not an option for me. 
I'm always feeling great even when simply cleaning my work space and rearranging my craft supplies.
Sometimes I could try out new materials or techniques.
And while doing all this, my mood always goes up and I am ready for the happy crafting again! 
All the pretty supplies - fabrics, pretty papers, paints, embellishments, provide the greatest inspiration to me. So even just holding them in my hands instantly makes me happy. :)


I chose this Mechanicals + fabric heart piece to showcase this emotions theme, because it was created for a very special person and evokes a lot of my warm and happy memories.


All my art work is emotion based. Whether it's a simple atc or an intricate altered art piece, I try to be very much aware of the emotional state I'm in while working. It influences all my choices: color, shape, texture, composition,...
And not only am I ok with that, that's why I'm into it in the first place. It really is my number one form of therapy. To that extend that I do not need another one. ;)

When I start a new piece, I choose which event of my life I want to focus on, and thus, the emotions that go with it.
But other than that, I do not think about it, I try not to choose my techniques or products in function of that moment of life.

Instead, I focus on following the first idea that pops in my mind. Because I know that even if I think about it for an hour or more, that first idea is what I will do anyway.

Once the piece is done, I do like to read it, because it often tells me a lot about myself and about my emotions. Why did I pick that color, or that shape? Those where the emotions speaking!

Whatever the event I choose to work on, if that's what I felt like expressing, it means it's important to get it out. Good things, bad things... The good things will give me a beautiful memory, the bad things will allow me to put it down and let it go.
The 'Fragile Heart' above is one of the 'heaviest' pages I ever made in my art journal  - it is about my retiring. It was not expected and surely not supposed to happen, so it got me down in a very bad way.
Until weeks later my mom reminded me it might be a good thing to put it down in my journal. I did and it helped me get over the sadness.
The page is dark and heavy, but I like it, only because of the process I enjoyed so much and because of everything that was going on in my mind while working. 
Do I even need to point out this was made in the period after my divorce? Naaa ;)
I had great fun making it though! So not all not so fun emotions turn out dark and grey on paper.
That only depends on where my subconscious wants to take it. And I always look forward to that, to discovering what is going on subconsciously so that I can be more aware of how I feel.


I'm kind of frustrated with lots of things that are going on in the world lately. I also had a bad cold, no energy, stomach issues, it was cold and dark, my head hurt.....whine, whine, and more whine.
Although I got 2 packages in the mail, and they piqued me artistic interest, I remained stuck in a rut and in my pajamas on the couch.
FINALLY, I took a hot shower, put on my big girl panties, dressed in my comfy sweats, and decided to.....MAKE SOMETHING!
Creating ART is better than Alka-Selzer Plus Cold Medicine. (For those unfamiliar with that, it's supposed to be the best for colds as clearly stated on TV, so it must be true!) Making ART makes me feel better every time.
I was clearly very happy with the results, and I know how really simple this project is...honestly!
So find a box, get out your paper clay and moulds and waxes, and make one yourself.

I added the paper clay moulds, while still wet, to an unfinished wooden pencil case with Heavy Body Gel.
The sides have a long thin mould and Pumice Stone Effects Paste to fill in the edges.
I used a palette knife to apply the paste. Let it dry.
The only paint here is the Heavy Black Gesso that's used to basecoat everything. Seriously.
All the other color is added by using the new Finnabair Waxes. The waxes are added with brushes and my fingers, depending on the size of the area and extent of color. A dry-brush technique works well, too.
The background of the box has several colors of the waxes with the vibrant Mystic Turquoise Antique Brilliance Wax stealing the show. It has an amazing ability to shine with different intensity when tilted to catch the light.

The unfinished wooden legs were painted and waxed before gluing them on with Heavy Body Gel.
The back really shows the gorgeousness of the Turquoise Wax and the contrast on the Pebbles using Red Amber Antique Brilliance, Aged Brass, Vintage Gold, and Rich Copper Metallique Waxes.
The hardest part is knowing when to stop... :)

A few more details and pictures are on my blogpost if you need more information or my 1st ever video on YouTube!


Personally, I don't think I'm that influenced by emotion in such a way as to depict it or use it in my creativity, although I have been told that some of my creations, and the stories I create to go with them, have evoked strong emotions in people.

As a scrapbooker I have been very caught up on; telling the story, and making myself feel good by the actual process of creating. The feeling I get from creating is a huge motivator for me to create!!! It is most definitely a mood lifter for me 😊.

In the early days of my scrapbooking I found it very therapeutic when I was going through a very stressful period of my life, and ever since then creating has become a 'go-to' method of relaxing.

In the last couple of years I have started to explore and experiment with different mediums and different art forms, and most recently I have really enjoyed creating with clay.
I tell people that my work with clay and the dolls and plates/bowls that I create are my therapy, and I really do mean that.
I come home from work and it is hard for me to unwind and relax enough to sleep so I sit and create with the clay, getting wet and dirty hands, and clay under my nails. It is just so good! I love it! 😊
With that in mind I would like to share with you 3 recent clay based projects that I have created; all of which are beautifully finished with Finnabair's most wonderful products - Black and White Heavy Gesso, Art Alchemy Paints and Waxes, large Art Stones and Concrete Stone Effect Paste.


I think emotions and artmaking are inseparable.
Sometimes it might be hard to find the reflections of different emotions in my artworks but that's mainly because I'm usually very focused when I create and in a way I put most of the feelings behind.
I just am here and now - don't overthink things, just immerse myself in the creative process and simply enjoy making a composition, choosing photographs, colors and embellishments.

I can honestly say that art and creativity can be very therapeutic - there's nothing better than splashing some paint or inks, make some creative mess around you in the comfort of your home. Highly recommended! ;)


Curious fact: I noticed that when my mood is low, I tend to reach for different shades of pink. :)  This palette instantly cheers me up!


I have to say that I am not always in the best mood when I start creating... but art definitely makes me happy and changes my feeling for the day. Art in any kind of form is always very therapeutic.
Sometimes you can see my emotions in my artworks, they do influence my art and you can often see them in the colors or stickers sentiments I choose.

It always makes my heart smile when I can create a piece that could be helpful to other crafters. I take a great joy in showing the basic techniques, explaining and walking you through my creative process.
This small mixed media canvas represents exactly this happy creative moment - it's qute simple and very easy to create for those who are just beginning their creative journey.

You can watch the whole creative process in this video I made and I hope you will enjoy it and feel encouraged to create with me!
I mostly played with brand new Antique Brilliance Art Alchemy Waxes and I really enjoyed them! The packagings are just the perfect size - not too large, not too small and they smell so great! :)
Another piece I'd like to share and that also perfectly represents the feeling of joy that I find making art, is also a small canvas with an old brush as my focal point. I love adding recycled elements to my makes.

I have strong emotions about creating. Getting my hands dirty with paints and mediums brings me joy and affect my current mood in a positive way.
Creating keeps me going, it  keeps me sane, I like to say. When I'm not able to create anything for a while, the longing to do something might get almost physical.
Then the next project doesn’t have to be an elaborate altered piece or canvas, but just something to make me spread paint on paper or stamp and color. Those projects may be a start of something I create for a brand or then just some fun playtime, not to be blogged or shared.

Sometimes I experience something that needs an output. That happens rarely, but when I feel angry, frustrated or puzzled beyond normal, I can take my journal and let the steam out. When something like that happens, I don’t document the project. No photos, no blog post. It’s just for myself, just to help me go through the emotions and nothing more.
Most of my projects are based on feelings. I like to create layouts about things dear to me, like my two daughters. This layout is one of such pieces - filled with emotions for my darling husband. :)
The highlight of the canvas projects or altered pieces is usually something fun or intriguing I have found or an item that has a story of its own. Like the scissors I got from my grandfather or the frame a reader of my blog sent to me. I may not tell the story in my write up for the project, but I know it and it brings that special layer to the piece.

The second photo is of a really rare thing – an outburst art journal page that I actually blogged.
See, never say never! :)

We all hope you enjoyedall these gorgeous inspirations and feel inspired to create more art conveying all sorts of emotions!
Happy creating!
Finn & The Team
Related Posts Plugin for WordPress, Blogger...