Wednesday 29 June 2016

Let's Imagine & Get Messy

Hi there my Friends!
With one foot almost on the plane, just before I leave on my another Canada/USA art adventure (exciting!), I'd like to share a new layout of mine.
I made it especially for More Than Words papercraft challenge blog - I took part in their June challenge and let me tell you - this was so much fun for me! The theme being 'Imagine & Get Messy' - well, easy to guess - that's exactly my cup of tea. ;)


I was more than happy to play with many delicious products from the latest Homegrown collection by 7Dots Studio. You will find the full product list in the links below, and I'm sure you will fall in love with this line.


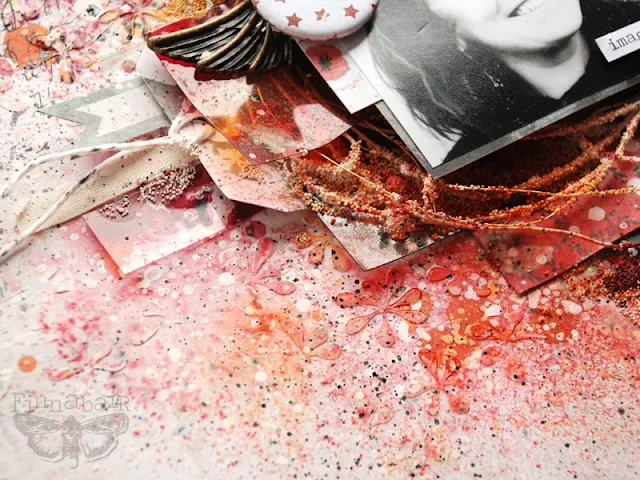
Making art messes is something right up my alley, so I thoroughly enjoyed making splatters of gesso, Indian ink, Brushos and alcohol inks. All this combined with multiple layers of 7Dots Studio embellishments and paper goodies.


How to express my energy and my crazy imagination on paper? :) Vivid colors married with Mechanicals, some wire and Mini Art Stones + my crazy photo - I hope it's convincing enough. ;)
Also see how great the Homegrown Floral stencil looks in the background!


Here are the materials I used:


I hope you enjoyed my new layout and the 'Imagine & Get Messy' challenge.
Have fun making your beautiful messes! :)
Hugs and see you soon!


Monday 27 June 2016

From The Family Album

Hello, Lovely Readers!
For a while now, we've been admiring Kasia's wonderful projects and especially her talent for showcasing her family photos. Whether new or vintage, it's a treat every single time. You will surely feel inspired to go through your own family album. Happy creating!


I can't break free from old family photos. I love to look at them, to remember family members and their stories.
For today's project I chose a photo of my mom, my grandmother and great-grandmother. In fact, I'm in this picture too, because at that time my mother was already pregnant with me. :)


I wanted to make my layout light, ethereal and delicate. That's why I used the vellum leaves and doilies and added transparent butterflies. You can learn how to create such butterflies from my video tutorial you will find below.


In this project, I didn't use many medias, but I added a touch of color using Art Alchemy acrylic paints. I love their vivid colors and permanent quality. They are also ideal for splashing.


And here's my video - enjoy! If you have any questions about my process, don't hesitate and leave them in the comments, I will be happy to answer.


I encourage you to reach for the old albums, maybe discover new family stories, give the old photos the new life.
xxx

Materials used:


Friday 24 June 2016

Lucky 13

Happy Creative Friday, Friends!
Athanasia has a beautiful mixed media treat to inspire us all! Whether you believe in luck or not, you will certainly feel like playing with paints and media after you see her new art canvas. :)


They say that 13 is an unlucky number. But what if we could define our own luck, stop being superstitious (I never was or will be, that's for sure) and decide to take chances even from things we never believed we could and even more it the end number 13 would be a lucky number?

Well, today's project is not about number 13, it's about being optimistic, taking risks and creating our own luck! :)


I was really in such a pleasant mood when I was creating this project and I think this mood shows up in the final result. I wanted to use bright colors that make me happy and what would fit better than the beautiful combinations of blue, pink, yellow and green of the Art Alchemy Acrylic Paints?


I painted everything with all these beautiful colors, even the metal embellishments like this cute Mechanical Butterfly and the front part of an old hand-watch I had in my stash.


Before I glued down the watch, I filled it with different Art Ingredients like the Art Stones and Mini Art Stones (I so love them!) and Bronze Micro Beads. Then I used 3D Gloss Gel to glue the watch on the canvas and make sure it won't go anywhere! ;)


I used my Silicone Brush to apply different texture pastes (all links below) and create an interesting textured background...


To make it even more cute, I used Jump Rings to hang some trinkets like a tassel, Roman Numerals (which actually are numbers 10 and 3 :) ), a gear and the title I made from a 7Dots Studio sticker.


Here is my video with the whole process. I hope you will enjoy it and get some ideas on how to create your own lucky piece of art.


Thank you for visiting.
Have a lovely crafty weekend!
xxx


Materials used:

Related Posts Plugin for WordPress, Blogger...