Hello, Friends!
I'm sure many fans of our Queen of Vintage - Linda - gathered here today. :)
You won't be disappointed and you will surely sigh that you'd love to have a little house like this at home. Well, you should use Linda's step by step tutorial and create your own little Assemblage cutie!
You won't be disappointed and you will surely sigh that you'd love to have a little house like this at home. Well, you should use Linda's step by step tutorial and create your own little Assemblage cutie!
You all know what it's like when your "Muse" leaves you... you got nothing... no ideas, no thoughts... NOTHING. Well, that's where I was.
And then, sitting there, looking at the walls of my Studio, seeing projects that I really love, several seemed to have a general "theme" ~ HOUSES.
It's what I started with 8 years ago, and so today, I go back to my roots and create what has always made me happy.... Little Assemblage Art Houses.
My husband and I spent several days tearing apart a bunk-bed to upcycle into a laundry basket cabinet, so we had lots of leftover wood scraps. I asked Bill to help me cut 3 houses with different heights and roofs, plus a base for them to sit on.
Here's how they were created. I hope you enjoy.
1. I start by covering the houses with Heavy Black Gesso on all sides.
2. Then I look through my Vintage Collectibles Ephemera for pictures and papers to use. The Soft Matte Gel with work to glue to the houses.
3. Next I lay out some Mechanicals, Wood Icon pieces, a Vintaj piece, a pipe fitting brace, and other ephemera for a start. As always, some will stay, and some will go, but this is a starting point.
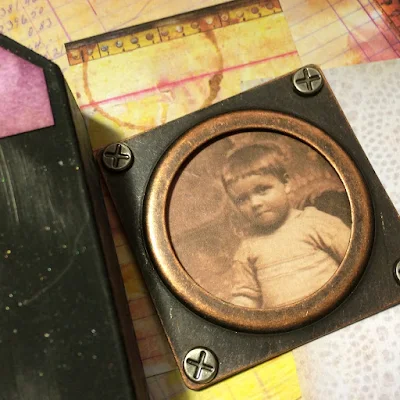
4. I used a punch to cut out the picture of the little girl, and 3D Matte Gel to glue into the Pendant. I also added color and shadows with pens to the children's pictures.
5. The Sunrise Sunset 6x6 Paper Pad is perfect for this project. Here I used Distress Inks to add more color and one of the Lace and Doily Clear Stamps.
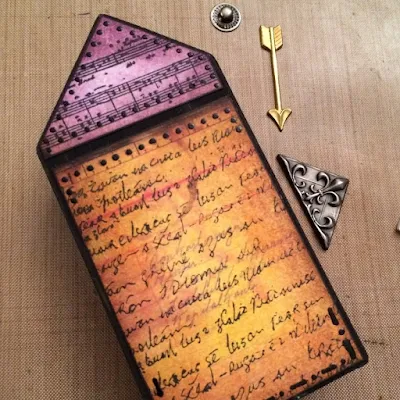
6. Each piece is cut, Distress Inked, stamped and edged with Glaze Pens. I cut the papers just a tiny bit smaller so a black border is created on the blocks.
The Clear Stamp Doorway is on this front section, and the tiny Doily is from the Lace and Doily set.
7. This was cut from one of the post cards in the Melange Ephemera Pack that has Distress Inks for color, and Mica Powders + Water sprayed on for some shine.
8. The Ruler in the Wood Icon set is so cool when you add various Orange and Brown Distress Inks. It looks very old and vintage.
9. This is some sort of pipe fitting (I think) from my stash of found objects.
The little boy is one of my favorites from the Ephemera pack.
10. This shows what a difference several layers of Distress Inks can do to a piece of rather white paper. On the left is the before....the right is the after. You can make any paper the color you want with just a bit of ink.
11. Here is the paper from the Collectibles that I cut the little girl from. The other 2 are just too sweet for words.
12. More Distress Inks and gathering of objects from my stash. The clear stamps Notes and Messy are stamped here plus lots of Distress Inks are used.
13. For the metal pieces I paint them with Black Gesso first and then use Soft Gloss Gel + Mica Powder as a paint to add color. Here is a snap and a grate from Plated Labels.
14. You can see the Wings Mechanicals, a child from the Vintage Collectibles and a piece of a Wood Icon here that I covered with Mica Powder + Soft Gel paint and some Inka Gold. I also rubbed Copper Inka Gold onto the Wings.
15. Blue and Purple Mica Powder + Soft Gel paint and Inka Golds, are added to the metal pieces for more color. The Plated Label Explore is left in its original color.
I placed the 3 houses on a scrap of wood that I added some Distress Ink color to, and painted the edges of the piece with Black Gesso.
The Ruler is glued on with 3D Matte Gel. It really looks cool with the black coming through the cut-out numbers.
That's it for today. Check out the links below for the products I used, and as always, ask any questions you have, as well as leave us your thoughts.
Your Friend in ART,
Linda
Products Used:


12 comments:
Wow, Linda! I absolutely LOVE everything about this piece! All the ephemera you chose to work with along with the colors are gorgeous! I love Vintage and using photos and you have nailed it!
Fantastic !
Corrie x
Very eye catching pieces of art. I love the backgrounds , perfect for,showcasing the focal,images and their ornate frames. Beautiful pieces and I love the stand. Tracy x
Stunning Linda, I just love your houses!! So glad your muse came back, these are so cool and what a fab idea!!!
I love the little houses and the stand. Maybe you could ask your husband to cut some more of these? I'd definitely buy a set or two:) Awesome project, as usual:)
Linda - I love these most wonderful and adorable houses - from the wooden structures, colors, papers and metals - you did an amazing job on these - and the tutorial is awesome.
Those are so inspirational ! Absolutely love them all ! Detail, colour and amazing composition, so beautiful ! Love, Marta xx
Linda, you did it again! These are Awesome! Love the color combinations and the stamps. The mechanicals are great and the ruler, too! I have to stop looking at your art. Every time I do, I see something new and want to try it! I'm going to go broke buying all this stuff!
Absolutely beautiful!! I really can't wait to start the Wanderlust classes now!
Linda, you are just awesome with everything you do!!! These are fantastic ❤️❤️❤️
He said he's retiring! Ha! But a miter box was pretty easy to use. Or just start with plain chipboard like on my blog header. Go, girl!
Love love love! So much inspiration and beauty on this project!
Post a Comment