Friday, 29 July 2016

Power of Flower

Happy creative Friday, folks!
I just love Irina's scrapbooking style, always so inventive and inspiring. Today's layout is no different.
You will want to capture some beautiful summer moments yourselves!
Hello! Irina Đťoncharyk with you here today and I'd like to show you and tell you about a new layout of mine I entitled: "Power of flower". I love summer and especially that riot of flowers that we get during this season. They delight and inspire me. I think it is impossible to be indifferent to flowers! Do you agree?
My page is dedicated to the power of flowers. The photo is of my mother's rose.

1. I took a white sheet. Using acrylic paints and a silicone brush I created color bars. I used the colors that correspond with the ones on the photo.
2. I wanted to make a dynamic compopsition in my layout. To do this, I took a black marker and energetically drew radiating lines. I wasn't too precise or careful and it only added to the general dynamic mood. Then I added some pink with an acrylic paint – also not too neatly.

3. I started building my composition. Added another two color spots - light pink and dark burgundy paint. I then glued small pieces of paper doilies using Clear Gesso.

4. To enrich the background, I used alcohol inks: pink, green, brown.
5. Then it was time for stamps. I used three different Finnabair silicone stamps: Sponge, Circles and Budapest Map. Notice that I wasn't too careful with the stamping either.

6. In the end, I added some torn paper tapes as the decoration and wrote the title with a black marker.

7. My layout was ready! As you can see it was super simple to make. Very quick, no complicated techniques, just loads of creative fun! :)

Here are some more details shots:


I hope you like this flower theme and my interpretation.
Wishing you all a beautiful, creative summer!
xxx
Irina

Materials used:


Wednesday, 27 July 2016

Altered Phone Fun

Hello dear ones!
Do you remember how last Wednesday I showed you one of my metal altered frames? I mentioned that this project turned out to be really loved among my students and guess what - it has a sister. ;)
Let me present another frame just begging to be altered. ;)
I know that this shape and surface might seem intimidating and difficult to work on at first, but believe me it's easy as pie and my students can confirm that! :)
I love mixed media techniques for being so versatile - you can apply them on literally everything, whether it's a flat canvas or any other 3D surface. Your imagination is the limit...

The techniques here are exactly the same here as with the Clock Frame, but of course you can play with any color palette that moves your heart and with any embellishents out there.

I went for my beloved Mechnicals, Art Pebbles and paper flowers painted to match the whole concept of a delicate golden-pink shimmer of my Art Alchemy acrylics.
Black Sand Texture Paste also contributed to the final effect.

Here are the products I used for my frame:


I hope you like my today's Phone Frame and that you will feel tempted to grab any object that moves your imagination and alter your heart away! ;)
Hugs xxx


Tuesday, 26 July 2016

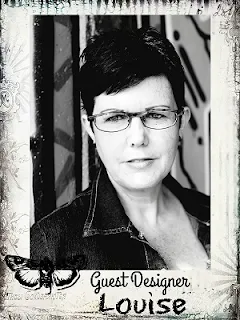
Guest Designer - Louise Nelson's Art

Hello my dears!
A Guest Designer is always a very special moment on the blog. It's such an honor to be having Artists from around the globe being part of Finn Team with their talents & creativity.
My Aussie friend - brilliant Louise Nelson - created a project that has never before appeared on the blog. You will fall in love with her bowl series - so artsy and inventive!
Make sure you visit Louise's beautiful blog called 'An Uninterrupted View' and get acquainted on facebook and instagram. This lovely lady is an inspiration that you will surely want to follow!
Hello Hello
I am so honoured to be guesting for Finnabair. I love her wonderful products and so love creating with them. I am overjoyed to share with you some of my creative fun using some of my favourite Finnabair products.

I have created 3 very fun and funky decorative bowls, that whilst not functional are fun and fab to look at.

I began by creating the bowls using an air hardening modeling clay and some recycled chicken wire. These need to be allowed to dry approximately 24-48 hours. I kneaded and rolled out the clay, based on the manufacturers directions to desired shape and size. I used a rolling pin and rolled the clay out on a pastry sheet. To mould the clay over the chicken wire I first covered the outside of a bowl with plastic lunch wrap, then overlayed the chicken wire, then overlayed the rolled out clay sheets. I left them like this during drying time. Before decorating the bowls I sealed the clay portion of the bowls with a coat of Finnabair Heavy White Gesso.
I then painted the clay part of the bowls with Finnabair’s wonderful Art Alchemy acrylic paints, as you can see with the above ‘before’ photo of my ‘Bird Bowl’.
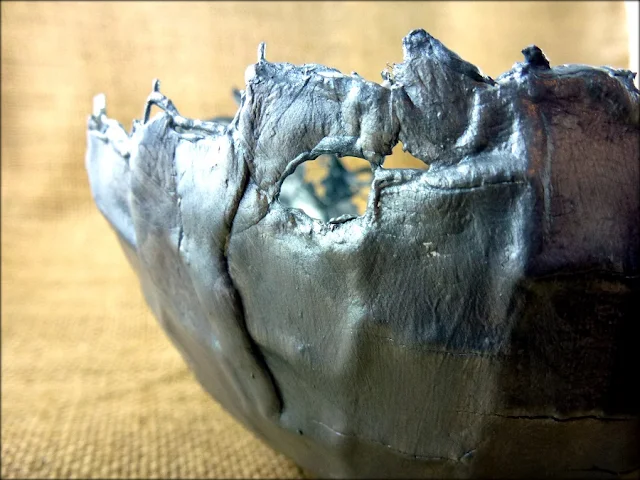
With each of the bowls I have incorporated a metal embellishment. With my silver ‘Foliage Bowl’ I have wired the metal branches to the chicken wire [as you can see with the ‘before’ photo above] and then painted it silver along with the clay portion of the bowl.
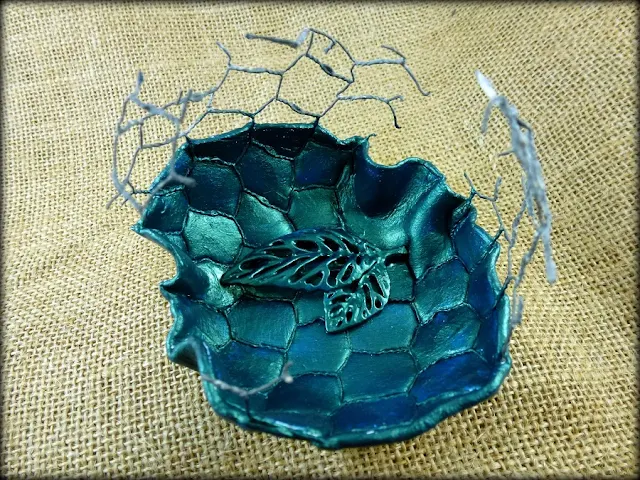
For my last bowl, my ‘Leaf Bowl’, I changed it up a little from the previous two and attached the metal leaves to the bottom of the inside of the bowl, like they were an actual trinket or piece of jewellery, just like you would store your rings in a small bowl beside your bed on your bedside table.

Well that it is it from me, I do hope that I have managed to interest you in my creative fun with making decorative bowls.

Cheers and Happy Creating!
Louise xxxxx

Materials used:

Related Posts Plugin for WordPress, Blogger...