Hello Dear Ones!
Get ready to be enchanted by my Creative Team once again! :) Kasia went small scale this time and I must admit that creating little projects has always been a challenge for me so I'm totally in awe of this one...
Get ready to be enchanted by my Creative Team once again! :) Kasia went small scale this time and I must admit that creating little projects has always been a challenge for me so I'm totally in awe of this one...
Interesting thing: not only did Kasia create 2 stunning tags being super creative on a relatively small surface, but she didn't use too many products either! Which proves it's possible to achieve stunning effects without spending too much money - it's all about thinking creatively.
And Kasia tells us how... ;)
And Kasia tells us how... ;)
* * * *
Hello.
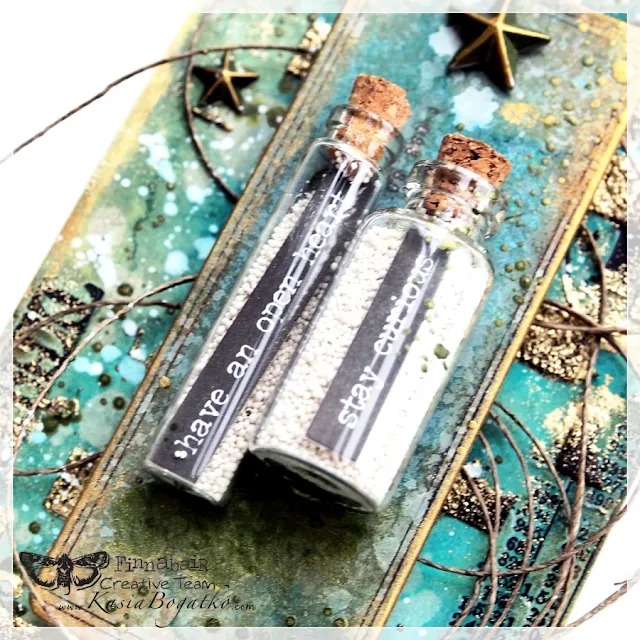
For today's inspiration I made for you these two
tags. I created both of them very spontaneously, out of the need of my heart and I'm really happy with them.
Only the tag with the little bottles comes with a video tutorial, but I wanted to
show you the other one too.
When
it comes to the technical side, it really isn't difficult to create such a
complex looking background.
Simply choose your favorite sprays and color the whole tag. Let the
colors mix, melt, create stains and splashes.
Add some print, numbers, sentiments etc. I chose
rub-ons, but stamps will work just as well, just remember to use permanent
ink.
I also found a great way to add some really interesting texture.
I
applied Art Extravagance Graphite Paste through the 'Checker' stencil, sprinkled unevenly with
embossing powder and melted it. I used golden powder that creates beautiful contrast and looks fabulous on this black paste.
Because
the background is quite rich and I really liked it, I didn't want to
cover it with too many embellishments.
In both projects I only
added smaller tags (colored the same way as the base), some twine and dreamy Mechanicals Stars and screws.
On one of the tags, I added inspiring messages (your own handwriting would look brilliant too!) in tiny
glass bottles half filled with delicate Mini Art Stones.
With all my elements ready, I added some accents with one of the brand new colors of Metallique paints - Golden Moss. I've never been a big fan of green but this one looks absolutely gorgeous!
Finally, a touch of Vintage Gold Wax on the edges and a few splashes of white acrylic ink here to complete the look and my tags were ready.
Add any fussy cut collage elements you feel inspired by. You can cut them out of a magazine, use vintage photos or Finnabair's Ephemera elements.
And now it's time for my video tutorial in which you'll see how I created the tag with the special message bottles. Enjoy!
As you can see not
only large and complicated projects can be interesting and fun to make. :)
Try to create something small and pay attention to every
little detail. Enjoy all the steps of your creative process and I'm sure you'll love it so much that you will not stop at one, just like me. :)
Products used:


No comments:
Post a Comment