Hi there my dearest ones!
I'm back on the blog with my new Art Recipe tutorial for you. Oh it's been a while... but I hope you will forgive me as my travels kept me really busy. I just couldn't resist to try to meet as many of you in person as possible!
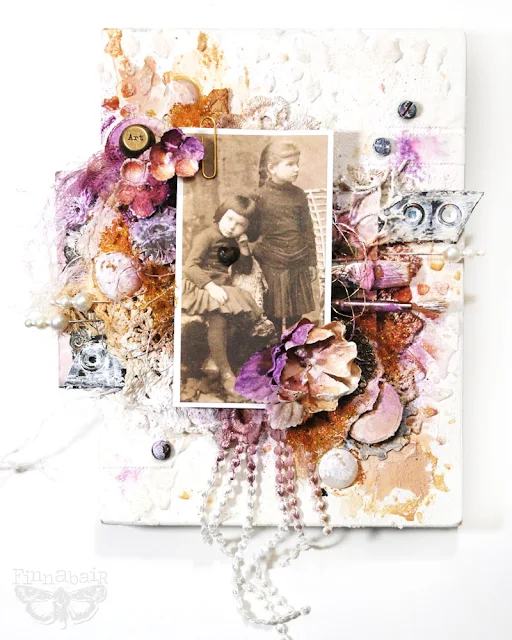
Anyway... I'm back and I've got a project base on my favourite art mediums, some NEW exciting product and quite exciting, a bit messy "wet on wet" technique. I made it on one of the new Prima products - the wooden panel - and I really love the final look!
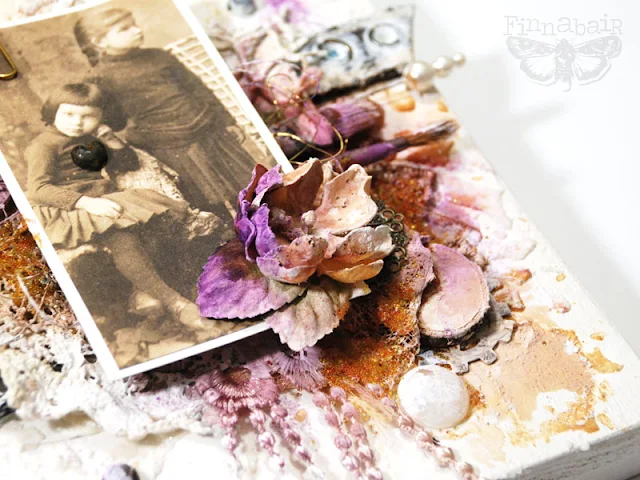
Here you can have a closer look at the details - I love the intense purple-pink against white... and those rusty-gold touches of tea stain and Micro Beads! Yum!
As usual, I was going through my bottomless boxes of collected items which I sometimes call "rubbish" - this time I found pieces of an old leather belt, some pearl pins, wooden embellishments and 2 old brushes - what a perfect combination. :)
Interested? Here is my full Art Recipe for you!
The whole process doesn't take that long - here is everything - explained for you, step-by-step:
1. First I took a blank wooden frame, which was covered with gesso and ready to go. You can try the same techniques simply putting a coat or 2 of Art Basics Heavy White Gesso on a piece of wood or taking a stretched canvas.
I started with creating some background texture using one of my stencils ('Lace') and Art Extravagance Snowflake Paste - I applied it just in selected places. It has a beautiful, coarse texture with a bit of sparkle - just like frozen snow! When I was happy with the amount of texture, I dried the background with my heating gun.
2. Next I started working on the layers - using tons of lace and doily leftovers, some tags and vintage papers from my Melange Ephemera Pack and Art Basics 3D Gloss Gel as my clear dimensional adhesive, I created my first composition.
Later, using the same medium for gluing, I added pieces of a leather belt, wooden and metal elements... basically all the embellishments I wanted to include except paper flowers which are too delicate for my next steps! I dried the project and I was ready to continue.
3. I took some of my Art Basics White Heavy Gesso and dabbed it with my brush on the top of my layers and embellishments - I wasn't going for perfection here, just to add some white colour and texture!
When my gesso was still wet I splashed some of my homemade tea stain and shimmering sprays in shades of pink and purple on the top of the composition. Working wet on wet you get really interesting, a bit random and splattery effects!
4. I repeated the same step with gesso and colours on the top of the paper flowers I wanted to include. I dried them perfectly as fast as I could to make sure they will survive this treatment!
5. Finally I added the painted flowers to my project and as a finishing touch I glued down some Art Ingredients Pollen Micro Beads - mostly around the photo.
I used Art Basics Soft Gel as my adhesive: first I dabbed the Soft Gel in the desired places and then simply sprinkled Micro Beads on the top of it. When the Gel was dry, my project was ready!
How simple is that? You should go ahead and try it!
And just in case - some more detailed photos for you - enjoy!
To make it easier for you here are the links to the products in our Mixed Media Place Shop:
I hope you liked my project and that you got a bit excited about my new products which will start shipping soon! I sure did!
Thanks again for visiting us - make sure to come back on Friday to see a brand new project and tutorial by one of my very talented Creative Team Members!
Sending warmest hugs


8 comments:
Beautiful and inspiring!
Lovely. I have both of your "melange" photos so I might give this composition a try. Happy to see you creating in the new year. I love your products and your art!
Absolutely stunning - maybe one of my favourite pieces of yours ever... the colours, the wood panel, the fabulous "junk" turned into art. Really loved seeing the process photos and how the whole thing came to be... beautiful!
Alison xx
This looks Amazing! I love the addition of the brushes and the piece of a belt! They say "one person's trash is another's treasure". The colors look so great with the tea stains too! I love when you post an art recipe.
Beautiful as always...love love love the colors. What are your new products Finn? Did I miss the release somewhere?
Beautiful work! "Rubbish" works perfectly! I also have a small box full of whatevers. :)
Finn, I just saw your new products on the Prima blog! wow the acrylic metallic paints are just beautiful and I love the texture powder. Hope they will be out for sale shortly after CHA??!!
HERMOSO...
Post a Comment