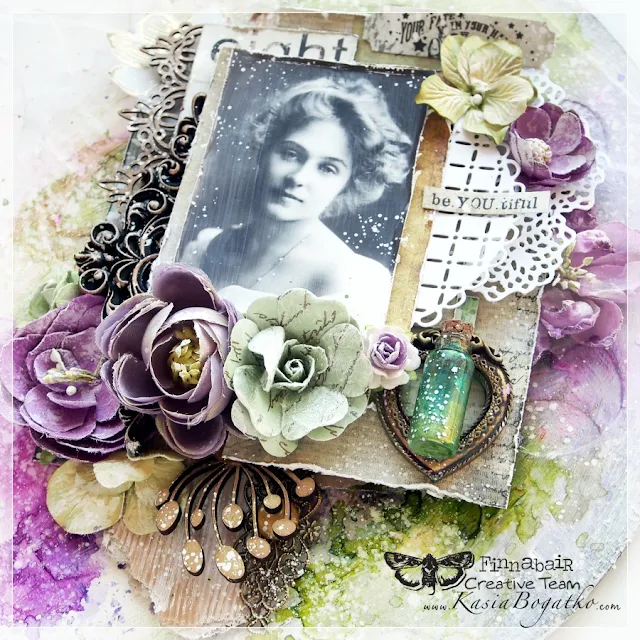
Hello lovely Friends!
Today we meet with Kasia who's presenting her brand new artwork - charming as always - and who used a certain special 'technique' that I too like to use while creating my journals and layouts. :) It's not complicated at all, all you have to do is... to simply look around your desk. :)
* * * *
Hello,
I think that many of you have on your desk a box (or several :) ) into which you throw all the trinkets, bits and pieces and odd things that may come in
handy one day... Does it sound familiar? :)
When I'm working on my projects, I often throw into my 'leftovers' box stuff that
doesn't match that particular piece, things I'm too lazy to properly put away when I change my mind and all kinds of different odds and ends…
:)
Today I have for you a project that was created using exactly such
"unnecessary" things.
As
you will see in my short video tutorial below, my background was made with leftovers from
die cutting. Once I had to cut out a lot of circles and stars and I thought that perhaps one day I could
use these papers in some way.
I simply glued them on my base, not caring too much how and then I covered the papers with a layer of Heavy White Gesso. This gave me great base texture and a fantastic dimensional effect.
Priming the papers with gesso made it resistant to paint and water. I knew that thanks to that, my papers wouldn't get deformed under a large amount of water and different media.
Gesso also helps to distribute the
colors which would otherwise simply soak into paper. This way they beautifully highlighted the irregular surface.
The photo that is the focal point of my composition was painted with Clear Gesso.
When it dries, it turns glossy photos into matte ones and I really love this effect, I think it adds to the vintage look.
Art Alchemy Waxes are always the perfect medium I reach for to add eye-catching final touches.
You can use them to create the shading or highlight all the elements you'd like to accentuate (paper, metal, resin - any kind of surface really).
I usually end working on a piece with splashing some white ink and adding a touch of white gesso here and there, I feel it makes the whole work more cohesive.
Here's my step-by-step video - I hope you'll enjoy!
So open up your junk boxes, pick some items and act!
I'm sure you'll quickly find some treasures in your 'trash'. ;)
I hope that my project and the video will inspire you to use and re-use some pretty bits and pieces.
Happy creating!
xx
Kasia
Products used:


3 comments:
FABULOUS creation! LOVE the tip - clear gesso over the photo! Thanks for sharing your process with your wonderful video!
Very,very nice!!!!!!
It was such fun to watch this beautiful piece come together.
Post a Comment