Monday, 28 May 2018

Best Day Ever

Hello dear Friends!
We're starting the last week of May with Tanyalee's brand new mixed media canvas and it's so beautifully touching and personal that I'm sure you'll feel inspired to create one of your own.
You'll love this new tutorial, please enjoy!

*   *   *   *
Welcome back for another process video of a mixed media canvas that I created using Finnabair’s products.
I have created a memory for my husband and I as we are celebrating our 20th wedding anniversary this year.
I started with a mini 6x6 inch canvas and layed down some ephemera pieces such as paper offcuts, vintage music sheets, stamped paper and muslin cloth which I glued down with Soft Matte Gel Medium.

I also added some Pumice Texture Paste from the Art Extravagance Stone Effect Pastes set and some Light Paste through a 'Doily' stencil.
Once the base layer was dry, I added a coat of Heavy White Gesso to even out the colours but still left the text peek through.
Then I created an ombre background using Art Alchemy Impasto and Sparks acrylic paints.
Next, I fussy cut the photo and lay it down with the pre-decorated tag gluing them down with 3D Matte Gel.
Then I created a frame at the bottom with more Mini Art Stones, muslin and some Melange Art Pebbles pieces.

Once everything was dry, I rubbed over some Art Alchemy Vintage Gold Wax to create a vintage effect, and added the word stickers.
Here's my video tutorial so you can see step by step how I created my special little canvas.


I hope you have enjoyed this new art project of mine.

I'm looking forward to sharing another tutorial with you again next month!

Yours in messiness


Products used:
 

Friday, 25 May 2018

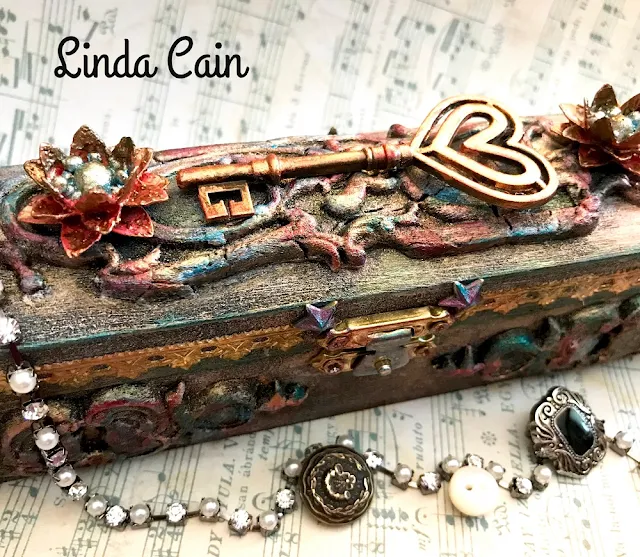
Ambassadors Spotlight - Linda M. Cain

Hi all!
I'd like to invite you to a new episode of the special feature on my blog I called Ambassadors Spotlight.

Last month I interviewed talented Monika Huculak and this time I'd like you to make yourself a cup of good tea and spend some time "chatting" to another great Artist who's very close to my heart and whose creations I have admired for many years now - my Brand Ambassador and a wonderful friend -  Linda M. Cain!


I just love how Linda called her blog "Friends in Art" (and this is how she always ends her emails :) 'cause this is exactly who she is - a wonderfully warm Friend with a big heart, always ready to share her art, beauty and inspirations!

You can admire Linda's beautiful art on her blog and follow her on facebook and instagram.

And here's what Linda says about herself.
Please enjoy and feel inspired!


I am basically an Artist interested in all mediums. I jump from one to another and love each one almost as much as the other. But, having said that, vintage patinas and rust with a picture from the past is what gets my blood pumping.
The only thing I love more is my family and all the crazy-busy things that keep us active in their lives. They mean the world to me, and I’m grateful for all the time they’re letting me spend pursuing my love of creating art.

1. How and when did you start your art adventure?

I suppose I started my adventure as a child.
I wanted to be an architect in grade school, but decided to get an art degree out of high school. My middle school teacher that tested us for career assessment looked at my results and said, "you should be a grease monkey instead of an architect." Needless to say, I'll never forget him.
But I seriously began after my 2nd child was born by taking watercolor lessons from a local artist. Later I found stamp and paper art when a friend started selling stamps and I was hooked.
2. What do you like the most about your style?

I like a 3D style that incorporates vintage and found objects with a photo from the past.
I love flea markets where you can dig around to find small discarded pieces of the past. The rustier the better. Bringing these items back into the spotlight for others to see is what I'm all about.
3. What are your art dreams/plans/wishes?

I wish I could finish more of the ideas that are in my head. Getting started is always a challenge for me. I overthink, which is what drives me the crazy. My dream would be to be able to just jump in and CREATE. Still waiting on that to happen.
4. What is your must have Finnabair product?

Hands down, my favorites are the Mechanicals. But I couldn't live without the 3D Matte Gel and the Gessoes. The pastes are a must have, especially the Patinas. Anything that gives a project added texture. But I love everything.
5. Share a quote that you find particularly inspiring.

"Blessed are the weird people... the poets, misfits, writers, mystics, painters, troubadours... for they teach us to see the world through different eyes." ~Jacob Nordby~

6. Share a word of of advice for all those who want to be creative and maybe are stuck in a creative rut or feel too shy or insecure to make and/or share their art.

Everyone has to be new some time; the kid waiting tables at the diner, the salesperson at the farm store, the teacher entering the classroom for the first time.
So be yourself, don't try to be Finnabair, or Adele, or Michael Jordan... we already have them... just be you. Create what YOU like.
And remember, we all evolve. I look back on my first pieces and cringe, but I kept trying and have learned so much.
If you want to be better, take classes in everything. Different mediums all blend together to make you a well-rounded Artist.

7. Show us your favorite artworks.

The Clock and Butterfly canvas is definitely one of my all-time favorites because of all the found objects and color that are surrounded by lots of texture.
The Lady in the Medallion which combines paper clay, metal, texture, vintage lace, and of course, a classic picture of a lady.
A Lovely Lady - a piece that is full of everything I love to work with.
I like to hang these little shrines above a light switch to see everytime I turn on the lights.
  I hope you enjoyed today's interview as much as I did. :)
Stay tuned to another inspiring Spotlight conversation in June!

Finn & The Team

Wednesday, 23 May 2018

Celebrating Art - in Purple!

Hi, my dear friends!
It's been a while since I was posting my project - so I think it's high time to fix this matter, right?
As you may know, I was away travelling and teaching in the last weeks - and now, after getting home I'm trying to catch up with all the important matters such as product designing, projects, and ehm... life? I don't know how it is possible but I still have to do all that boring stuff called "everyday life" - oh well...
Anyway, today I'm back with something I hope you will like - a sample I've made during my "Art Celebration" collage class... and I have to admit I loved it so much I took it home to take proper photos for publication! I experimented with new colour palette and here are the results...

As you can see I wasn't stopping myself when altering the brush - there is plenty of layers, embellishments, details - all that glued down properly with Art Basics Heavy Body Gel, the one-and-only-ultimate-glue-for-dimensional-collage ;) 
All my Prima Mechanicals and Pebbles  - even the brush - are going to stay on this project safely. Believe me - I checked. It was shipped home via Post services - and as you can see it is in perfect condition!

The colour palette, as I was mentioning, was an experiment with shades of blue and purple Art Alchemy Impasto Paints (I was focusing mostly on Cobalt, Aubergine and Heather) with touches of my Waxes on the top. I was asking in one of my IG posts which clours I've picked and not many of you could guess! In fact I've only used 3 colours: Metallique Rose Gold and Metallique Old Silver as a base and a bit of Antique Brilliance Fire Ruby as a highlighting touch.
What do you think about this colour combination? Would you like to try it?

I know it is not possible for me to travel to every corner of the world - but maybe you should check my classes schedule here and see if I'm not closer to you than you think? 
This class I'll be teaching very soon in UK - at Art from the Heart, Harrogate  - first weekend of June - but there is much more happening this year!

For those of you who can't see me in person - there are options too!
You can register to my online classes (listed on the left sidebar of the blog) or join my FB Live Shows - just like this one, happening this Thursday, 24th May. Just jump on my FB Page, join and subscribe and w you won't miss it! Not n Facebook? no problem! Later on I'm trying to add the recorded versions of the show on my You Tube too.
Generally - if you like to be updated more on my current status - travels big and small, latest projects, all the things I'm doing in the meantime, updates from my studio and more - I can only recommend following my IG accounts: @finnabair will give you a peek into my everyday reality and @finnabair_studio - endless flow of inspiration by my Teams, me and all talented fans from all over the world - you can't miss that!

Hope you will follow, drop in and say hi!
See you soon!
SaveSaveSaveSaveSaveSaveSaveSaveSaveSave

Monday, 21 May 2018

My Colourful Summer

Hello everyone!
I hope you're having a beautiful, creative month of May!
Get ready for some more great art inspirations from my Creative Team - today it's Sanda whose new canvas (or rather 3 of them...) is so filled with vibrant energy, it will immediately make you want to grab your paints! :)

*   *   *   *

Hi guys,
Sanda here today, sharing with you a fun and quick little project, very easy and beginner friendly 😊
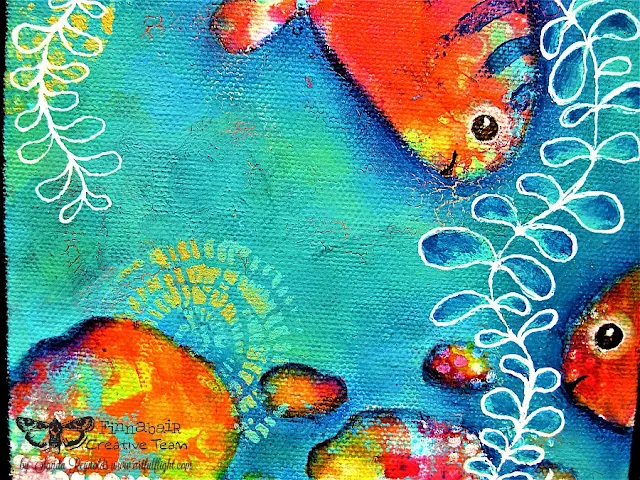
With Summer here in full swing, I was inspired to create this mixed media canvas triptych, full of rich and vibrant colours and Finn’s paints goodness. So, let’s play, my friends!
I started by applying a coat of Finnabair's Heavy White Gesso on three small canvases (about 6 x 8 inches) using one of Finn’s brushes.
I dried the gesso quickly with my heating tool and, because I knew I would be working on all three canvases at the same time, I taped them together on the back with some masking tape.
I started painting my canvases using Art Alchemy Impasto paints – for the first layer I chose cool colours (Jade, Green Apple and Azure).
I diluted the paints with a spritz of water and then I sprinkled rubbing alcohol and coarse sea salt to create a lovely texture.
I dried everything with the heat gun, removed the salt and then I applied a second layer of paint, using a warm palette of Impasto paints (Lemon Peel, Raspberry Pink and Crimson).
I also added some fluorescent acrylic ink.
When this layer was dry, I added more paint in different places and then, using baby wipes, removed some of it through Finnabair stencils.
Next, I added touches of white, here and there, sponging Snow White Impasto paint through another stencil.
I drew my cheerful fishes using a handmade template and added some marks using Cobalt, Pumpkin and Crimson.
I painted the background in Jade and Snow White for the sky and Jade, Azure and Green Apple for the sea, using Cobalt for shading.
As a finishing touch I added Jade and Gold Rush Art Alchemy Metallique, sponging through a different stencil and added some doodling with a white gel pen.
Here is my video where you can watch my creative process and see the products I used.
Enjoy and have fun!


I hope you’ve got inspired by this project and you are ready to try some of these techniques in your artwork.

“Summer was a book of hope…”
- Benjamin Alire Sáenz

Have a lovely day, my friends,
Sanda xoxo


Products used:

Related Posts Plugin for WordPress, Blogger...