Tuesday, 31 January 2017

Designers' Faves - A New Challenge!

Dear Friends...

On behalf of myself and my Creative Team,
I'd like to invite you to a brand new series of creative challenges!

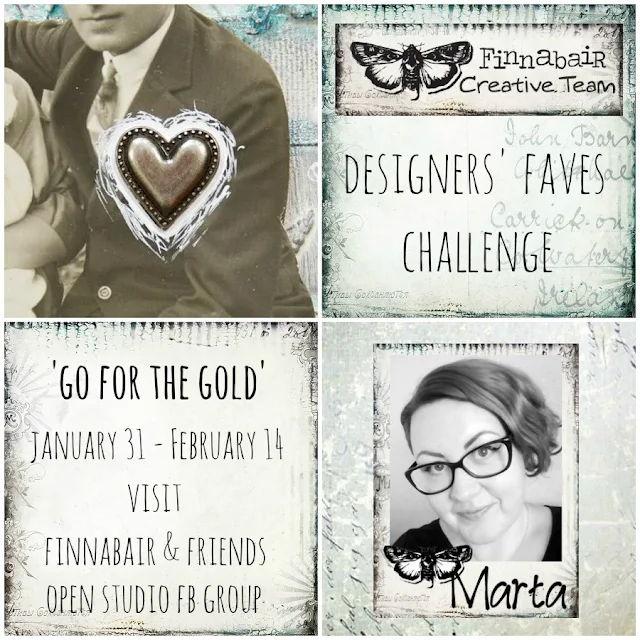
We called it Designers' Faves -

- on the last day of every month one of the wonderful Artists from my Team will be sharing their favorite inspirations, techniques, ideas and creative guidelines.
The challenge will take place in our Finnabair & Friends Open Studio facebook group - that's where you can join it. All the rules and instructions will be found on Designers' blogs.

Our first challenge is hosted by our talented Marta!

If you'd like to know more, you can read about her idea for this month's challenge in this blog post.
That's where you will also find Marta's gorgeous artwork to inspire you and all the instructions for the challenge.

There will be fun, there will be Art, there will be prizes of course! ;)
Here's what you can win:
I hope you're already feeling excited and that soon we will have the chance to see your gold inspired Art!
Happy creating!
xx

Monday, 30 January 2017

John's Artistic Frame

Happy Monday, creative people!
John's one of a kind creations keep amazing us again and again.
Today he used my new release Waxes and Sparks paints to create his mixed media frame - it reminds me of a fairy tale magical mirror, wouldn't you say? ;) Enjoy!

Since the introduction of the new Metallique Waxes and Sparks Acrylic Paints, I have to admit that I've had so many projects swirling around in my head that I couldn't decide on which one to start creating with!
After being inspired by Anna at the Creativation Show this past week in Phoenix, I couldn't wait to get home and start getting my hands covered in these fabulous new products!
Today I'm sharing with you my Artistic Frame that I created, with the idea of showing you just how vibrant and spectacular the new Art Alchemy products are!
To begin this project, I painted my frame and all of my embellishment pieces with Heavy Black Gesso and allowed to dry.
To cover up the inside of the frame, I used the Clear Sculpture Medium to shape and add texture to the fabric.
If you haven't worked with the Sculpture Medium on fabric before, you can visit my previous blog post here to watch the video.
Now it's time to have some fun with the new Sparks Acrylic Paints!
To begin, I dry brushed Unicorn's Hair (don't you love the name!?!) over the entire frame, fabric and all of my embellishments to be added onto the frame.
Once dried, I dipped my finger into the luscious Green Brocade Opal Magic Wax
Just like the line of Metallique Acrylic Paints, the new Waxes have either a 'solid' color or an opalescent color.
To add more color to the embellishments and frame, I applied a touch of White Gold and Opal Vintage Silk Waxes, followed by a highlight of Lucky Emerald here and there.
Because I was afraid of everything blending together too much, I went back through and added Opal Royal Robes Wax to add a contrasting color to make my embellishments stand out a little more.
For adhering my Mechanicals embellishments, I mixed the new Pumice Stone Effects Paste with Unicorn's Hair and Fairy Wings Sparks Acrylic Paints and then randomly applied down to the frame before adding the embellishments.
Once the texture paste was dry, I dry brushed over the paste with a touch of Sparks Unicorn Hair just to add a little more sparkle and randomly added a few touches of Fairy Wings on the frame also.
 

There are so many possibilities using the new Waxes and Sparks paints that I can't wait to show you my upcoming projects!


If you'd like to see what I'm working on in between my Finnabair Creative Team posts, be sure to follow ArtNewWave on Instagram for more inspiration.

Have a creative week!
John


Products used:


Friday, 27 January 2017

Ambassadors' Meeting - Hopes, Plans & Dreams

Hello Lovely Friends!
It's time for another inspiring meeting with my super talented Brand Ambassadors!
Today they are sharing their stunning new Art and we also talk about their Hopes, Plans and Dreams for the new year - so thought provoking and motivating in the most beautiful ways...
You can also see what happens when these amazing Artists get my new products into their hands...
Pure Magic! :)


My plans and resolutions for 2017? Hmm... I've never been very good at these...
But I do have many dreams - to find some stability in my personal life and to keep growing in my artistic life.
I dream about having more courage, to take more risks and to make my dreams come true.
My motto for the new year is the same as all the previous years really: Just Create!
Practice makes perfect, right? :)

I wish you to find your own path (both personal and artistic ones) and to find lots of Joy in your lives!
As for the piece I'd like to share with you today - no, you're not mistaken, this photo is NOT black & white. :)


This is the result of me playing with a very limited palette. I achieved this effect thanks to Black Gesso, a little bit of white acrylic paint, Stone Effect Pastes and Old Silver Metallique Wax. I love how it all turned out!


I always look forward to new year fresh starts.
I'm not usually into making new year resolutions, however I do like to think about what I have done and achieved and refresh my approach to life and all of those things on my wish and 'to do' list.

For 2017 I will continue to explore my creative to do list; especially in the area of assemblage/sculpture and pottery/ceramics. I also need to finish some personal projects that include 2 wedding albums. :)

The artwork I'm presenting here today was inspired by the 'The Lord of the Forest' myth. I created my interpretation of Tane Mahuta whose fascinating story you can read on my instagram. You can see more shots of my piece there too.
I began by applying Heavy White Gesso to a small plaster statue. Then a layer of Stone Effect Concrete Paste to emulate a skin made to look like dirt.
I adhered metal branches and pebbles to emulate stones and tree branches. Then a coat of Color Bloom spay mist and 2 of the new release Waxes to make it look like it had been made from dirt, trees and stone. I also applied blue wax to the head to represent the colour of the sky.


It's 2017 already. I cannot believe it. It seems like only yesterday that I started playing with Anna's wonderful products...
The newest release is probably one of my favorites because I've always loved the look of Waxes. They add a metallic flare and are just plain fun to get into with your fingers.
The new Patina Effect Pastes are magical. Then you have the Sparks!
Here I started with a black tag and Limestone Stone Effect Paste on a stencil. I added lots of Waxes of all colors.
Then the metal pieces and paper flowers were painted, pasted, and waxed.
I added a couple of embellishments made with moulds and I painted the numbers with Sparks. It's bright, and shiny and full of texture. If you'd like to know more about the creation of this tag, please visit this post on my blog.
My motto this year I guess is "Hope for the Best". Our world here has been turned upside down and I just hope everyone comes out OK on the other side. I truly want the World to make it through the coming year and have a sense of Peace...

I haven't made any resolutions as such, but my wish for the 2017 is to have more play time. Just create out of the passion, not to any particular assignment or deadline.
I just started working more hours on my day job and because of that, I needed unfortunately to cut back some design teams.
The other reason was that I hadn't had the time to "just create" for quite some time as there's deadlines pushing in. So my wish for 2017 is to just create, just to play with the products and see what they can do.

To illustrate this, I made this little canvas. It's actually started as a demo sample way back 2016, but I have kept it and thought to make something of it.
So now, when I actually had a moment to play, I coated the piece with Black Gesso and then started to try out the new Waxes! There's something so relaxing and soothing about playing with them. They smell phenomenal and also the effect is stunning. They turn anything into metallic, reflective goodness!

My other wish for the year is to teach and learn more. Each workshop I keep gives me so much as I learn as much as the persons attending. It powers me up, makes me want to push even further and experiment more. I just added some new workshops in my repertoire, so if you'd like to see me during 2017, please don't hesitate to mail and ask! In my blog's sidebar there are some dates that are agreed already.

Have fun and play! Wishing you a creative, innovative year!


This album shows one of my mottos for this year: trying new things. :)
I was supposed to create an album for man and it was quite a challenge... With no flowers? ;)
Turns out it's not that difficult! I love how it turned out: only 10 pages, but it can hold from 88 photos and up!
It has lots of pockets and can hold many secrets.
And, of course, the main masculine accents are created with Finnabair's metal Mechanicals embellishments!

Apart from trying new things this year, I am planning and dreaming about travelling and discovering new places of the world.
Wishing all of you, friends, not only to make resolutions, but take confident steps towards achieving your goals!
Here's a video in which you can see my 'masculine' style album, I hope you like it as much as I do.


I'm sure you loved today's meeting with my Brand Ambassadors, so packed with beautiful inspirations and reflections...!
Do you too have any artistic goals and dreams for 2017?
We're so curious and would love to hear about them! Drop by our Open Studio facebook group or leave us a comment.
Happy creating, everyone!
Finn & The Team

Thursday, 26 January 2017

Covered in Wax - altered books (and Creativeworld invitation!)

Hi there my creative souls!
I've just got home from Phoenix show - Creativation - and oh boy, this was a ride! We've started early with classes and Art Venture to finally set up our new booth on Friday and meet our lovely visitors on Saturday morning... this and a lot more you can see on our Instagram accounts: mine, Prima and Prima- Mixedmedia - check us out!

Today I'm getting ready for the next show - Creativeworld in Frankfurt, so those of you who are coming - please visit me there! Here you can see my demo schedule - visit us at Notions Marketing booth!

And as a treat, I've got 2 samples I've created for this show using mostly 1 product - my new Art Alchemy Waxes. They are simply amazing and luscious: sparkly, metallic and iridescent, even with antiquing, brown undertone - all that packed in a cute, metal tin similar to lip balm... oh wait, did I mention they smell nice too? You have to check it out!

 Her is the combination of Art Basics Heavy Black Gesso over texture made with stencil and Modeling Paste - and with a pretty modest (!) composition with just a bit Art Pebbles and Mechanicals. Can you see these lovely colours?
As you can see Waxes are able to create beautiful, soft layers of colour revealing the beauty of the texture in the same time! And when applied with fingers, they are just perfect for highlights - it is so simple! You want to learn more? Check my tutorial videos here!

I have to admit I just love those cold, deep ocean-inspired colours. A touch of glass glitter makes the project special too!

I couldn't resist and I had to add some seashells I collected this Summer during my short vacation in Ireland. As always, Art Basics Heavy Body Gel worked miracles... all my embellishments and findings stay safely on the book cover!
I hope you feel inspired - and you will keep watching me and my travels online. All the new products will be shipping any moment now, so please keep your eyes opened!
Expect some more Facebook Live videos from Creativeworld too - I'll do my best to share as much as possible!

See you soon - keep your fingers crossed for me, please!
huge hugs!


Monday, 23 January 2017

Heart of My Home

Lovely Readers - do we have a treat for you today!
Karolina has simply outdone herself... Her new artwork is something you have never seen before on my blog! :)
Ladies and gentlemen, get ready for an altering feast.

Hello, everyone!
Karolina here and today, I have for you something very special, a unique object with a soul of its own. Are you ready? :)
In general, I love to give second life to things - why? Apart from it being a very eco thing to do, I also love the idea of giving ordinary objects a completely new purpose, a new destiny of sorts.
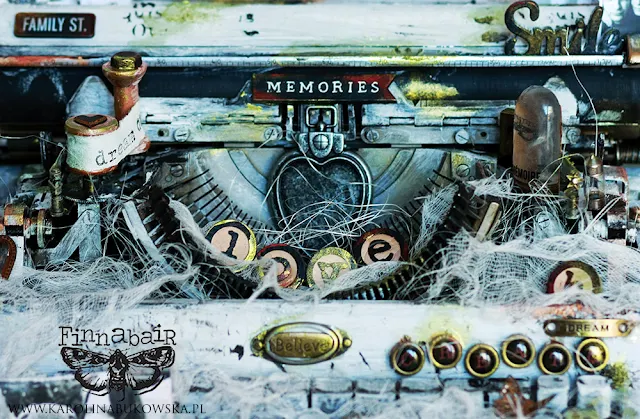
So today I have for you a brand new altered project of mine - a typewriter!
Apart from having a beautiful artsy typewriter at home, I also had this idea to treat it as a kind of an original display for photos.
I can already feel that this thing will be the very heart of my studio and home.
If you want to see how I altered my typewriter, there's a step by step video waiting for you below.

First, I of course started with thorough cleaning and drying and then covered everything with Heavy White Gesso.
I love all kinds of distressing effects so you will see how I used different media to create a vintage, time-worn look for my machine.
The best products to achieve this kind of effect are Finnabair's new Art Alchemy Brilliance Waxes (I used Fire Ruby); here I combined them with new Sparks Acrylic Paints (Fairy Wings and Raven Black).
Thanks to these products I easily managed to give my typewriter a distinctive character of its own. They have a beautiful shine and I must admit I fell in love with the Waxes and Sparks right away.
I wanted to created some special textured touches so in some spots I used Modeling Paste and Graphite Art Extravagance Texture Paste through different stencils.
To add even more interesting texture, I recommend trying out new Finnabair's Stone Effect Paste - I used Pumice applied with a silicone brush here and there.
After that I glued some embellishments with Soft Gels (both Gloss and Matte).
I stamped a canvas strips (making a cute ribbon this way) with some of my favorite inspiring sentiments from Finnabair's stamps sets.
I also used the stamps to do some freehand stamping here and there on the whole machine.
I love all kinds of 3D elements to decorate my art with so of course I couldn't resist adding them here.
The metal embellishments add a scpecial kind of charm to my typewriter and really emphasize its vintage beauty.
There are also stickers on the keyboard - I put a bit of gel medium on them which created a sort of a glass effect with a pretty glossy shine. You can also get ready made 'buttons' like that - check out Finnabair's Typewriter Words and Numbers.
The spaces between the buttons are filled with cheescloth and sisal fibers.
A delicate final touch of green Sparks paints and copper Wax - I'm not too keen on green and red but somehow they worked perfectly here.
Finally, everything was ready to place my family photos.
So are you ready for my video to see how it all happpened? :)
I hope you'll enjoy it and if you have any questions at all, please leave them in the comments.


I just love altering objects, especially adding the final touches.
It's always such a special point in the creative process - just me and my artwork, a private moment of a magical dialogue between me and my art.

I truly hope you will love my typewriter as much as I do. :)
And I hope I tempted you to alter some interesting objects in your house.

Happy creating!
Karolina


Products used:

Related Posts Plugin for WordPress, Blogger...