Hi again, my dear ones.
I'm back and I've got something not usual for you today.
As some of you know - we've moved into old, (I mean REALLY) old house last December and in the last months we were unpacking, getting settled, converting the garage into a studio and moving my boxes, carts, shelves into the final destination. We were also trying to take care of the garden, dogs, cat and live normal lives - which I had to accept is not possible for us at all. Nothing is normal or usual in my life and that is the way it has to be. Well, let's adjust the sails and go through the storm!
If you'd like to see some snapshots from our private, everyday life - here they are on our Instagram account - @innisfail_house. We won't flood you with foodporn, photos of feet or tons of selfies, I promise ;)
One of the things about the old houses is they need love and attention. We are ready for this challenge - and I hope our enthusiasm won't cool off too early ;) We've already fought with a leak, peeling paint, snail and wild pigeon invasion on our garden... and let's not forget the constant battle with tons of elements which are waiting to finally get in the right place!
One of them is this old, very damaged trunk, which we bought about 2 years ago and used in our previous home as DVD player and mini home-theatre storage. Andrew added some basic shelves to it and all our speakers fit inside perfectly! I love second hand furniture and home decor shopping, so no wonder this tattered beauty was on my list!
This is not strictly mixed-media project... but I hope it will give you some inspiration and ideas too :)
Of course - it was not possible to keep it as it was - it was too dark for our living room and far too damaged to suit our needs - it was high time to give it a proper makeover!
I started with a good coat of Chalk Paint - inside and outside - to give me a base and also follow the colour palette I had on my mind. (I used Annie Sloan Old White Chalk Paint). The change was dramatic.
Next, when it was all dry, I started to work with sanding paper and blocks to reveal and accent all the beautiful, metal details - there was a lot eye-catching rust and patina on it - and I wanted to see it again!
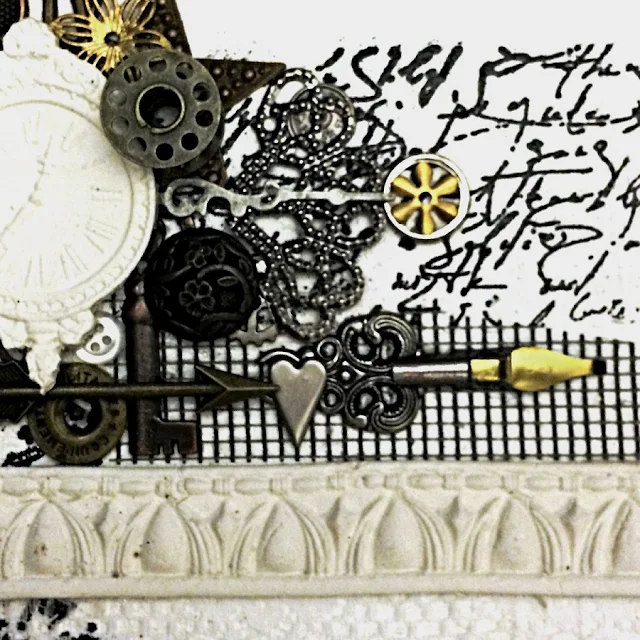
After that I decorated the front of the trunk with elements I've made using Prima IOD Designs Vintage Art Decor Moulds and some plaster - I wanted to cover not the prettiest round hole someone made just on the front and add a bit of sophisticated charm to the project.
Guess what? My Art Basics Modeling Paste was a perfect gluing choice - white, strong and flexible. Score!
When everything was dry I could start working on the finishing touches... which cost me a bit of sweat, I have to say! I used a combination of Clear and Dark finishing Wax (Annie Sloan again) making sure all the beautiful details will be visible. I loved the effect - and so did Andrew :)
And here is the reason for the whole makeover - it is going to stand next to my quite decorated fireplace, which got it's makeover in December. I didn't want to over decorate it - as it is going to be in a company of a very detailed statement piece and a bookcase cluttered with my projects, findings and collection of old cameras, books, photos and... and... more...
Sending love - and asking - would you like to see more of the home-decor posts in the future?
Please let me know :) I still have couple of things to alter ;)
I'm back and I've got something not usual for you today.
As some of you know - we've moved into old, (I mean REALLY) old house last December and in the last months we were unpacking, getting settled, converting the garage into a studio and moving my boxes, carts, shelves into the final destination. We were also trying to take care of the garden, dogs, cat and live normal lives - which I had to accept is not possible for us at all. Nothing is normal or usual in my life and that is the way it has to be. Well, let's adjust the sails and go through the storm!
If you'd like to see some snapshots from our private, everyday life - here they are on our Instagram account - @innisfail_house. We won't flood you with foodporn, photos of feet or tons of selfies, I promise ;)
One of the things about the old houses is they need love and attention. We are ready for this challenge - and I hope our enthusiasm won't cool off too early ;) We've already fought with a leak, peeling paint, snail and wild pigeon invasion on our garden... and let's not forget the constant battle with tons of elements which are waiting to finally get in the right place!
One of them is this old, very damaged trunk, which we bought about 2 years ago and used in our previous home as DVD player and mini home-theatre storage. Andrew added some basic shelves to it and all our speakers fit inside perfectly! I love second hand furniture and home decor shopping, so no wonder this tattered beauty was on my list!
This is not strictly mixed-media project... but I hope it will give you some inspiration and ideas too :)
Of course - it was not possible to keep it as it was - it was too dark for our living room and far too damaged to suit our needs - it was high time to give it a proper makeover!
I started with a good coat of Chalk Paint - inside and outside - to give me a base and also follow the colour palette I had on my mind. (I used Annie Sloan Old White Chalk Paint). The change was dramatic.
Next, when it was all dry, I started to work with sanding paper and blocks to reveal and accent all the beautiful, metal details - there was a lot eye-catching rust and patina on it - and I wanted to see it again!
After that I decorated the front of the trunk with elements I've made using Prima IOD Designs Vintage Art Decor Moulds and some plaster - I wanted to cover not the prettiest round hole someone made just on the front and add a bit of sophisticated charm to the project.
Guess what? My Art Basics Modeling Paste was a perfect gluing choice - white, strong and flexible. Score!
When everything was dry I could start working on the finishing touches... which cost me a bit of sweat, I have to say! I used a combination of Clear and Dark finishing Wax (Annie Sloan again) making sure all the beautiful details will be visible. I loved the effect - and so did Andrew :)
Some details for you - I love how dark wax helps to show all the beautiful textures...
And here is the reason for the whole makeover - it is going to stand next to my quite decorated fireplace, which got it's makeover in December. I didn't want to over decorate it - as it is going to be in a company of a very detailed statement piece and a bookcase cluttered with my projects, findings and collection of old cameras, books, photos and... and... more...
Here are the items I used for this makeover - I hope it helps!
Sending love - and asking - would you like to see more of the home-decor posts in the future?
Please let me know :) I still have couple of things to alter ;)


