Hi Friends!
Remember me saying that October is a very special month for me? There's so much going on so many fronts!
I'm going to announce my new Creative Team next week, still reading (and re-reading) all your beautiful emails very carefully. :) And while I'll ask you to be patient a little bit more, let me tell you about a group of 7 wonderful Ladies who kindly agreed to become my Brand Ambassadors!
They're not only crazy talented Artists, but also beautiful souls and I'm proud to call some of them my Friends. I can't tell you enough how much I value their suport and our creative cooperations.
Once a month we will meet in special Guest Posts here on my blog and the girls will share links to their favorite artworks, tips and tricks on how to use my products, but most of all, their hearts and souls to keep us all inspired!
Make sure you keep an eye on their social media, book a workshop, leave a friendly comment, make a connection. Each of these Ladies is a never ending well of inspirations!
But enough talking. Let me properly introduce these 7 wonderful Artists - I'm sure they are familiar faces. Will you help me say an extra warm welcome to my Ambassadors team? :)
Each of these beautiful Artists is here today in this first Ambassadors' post sharing stunning artworks especially close to their hearts + a short and super sweet surprise interview. :)
I first heard of Anna... a few years back when I started discovering Mixed Media for myself.
My must have Finnabair product is... 3D Gloss Gel as it can be used with all kinds of pigments, glitter etc.
But it's hard to choose only one favorite product. I love all of them!
The project I'm showing here today is special for me because... I have put a lot of emotions into it. Black Gesso, glimmering colors...
I have never created such a project before. The background of the
layout is created with computer motherboards. {see more}
Why Finnabair? :) I am proud to be one of Finnabair Ambassadors not only because it's a great honor to work with such talented people, but also because it's a perfect opportunity to share my inspirations and tips on using Finn's products.
I first met Anna... on one of her first international teaching trips in 2011: I was her guide for a little tour in Brussels and a translator for her during the workshops. For the fan I was back then (and still am), it was just a wonderful way to get to know her up close and personal!
My must have Finnabair product is... wait... are you kidding me? 'Product' as in one only?? Ha, I know: Art Basics! All of them. Lots of them. To start with. And the Rust Paste. And the Modeling Paste. And the Crackle Pastes. And the silicon brushes. And... Sorry, can't help myself. I need an intervention. ;)
The project I'm showing here today is special for me because... on top of featuring a whole bunch of Finn's products, it also features a couple of other essentials for me. This art journaling page also has a special meaning for me. Can you guess? ;))) {see more}
Finnabair because... she has a whole Artsy Universe of her own. And she has a neck for inviting all of us to travel with her through that Universe and for making us feel home there.
I first met Anna... at CHA several years ago. We had both contributed projects to the show, so I knew who she was. I ran into her at the show, and she graciously took me over to the Prima booth where she had 2 of her large canvases on display. We spoke for several minutes on our love of mixed-media that included found objects - especially metal and paint. She was kind, excited, and humble. She gave me her card which I have to this day. So when I, just by chance, saw her call for designers with a 10 day open window, I jumped in, and was thrilled beyond measure to join this talented group of Artists with Anna at the helm.
My must have Finnabair product... has always been the Mechanicals. I've collected ephemera and found objects to put in collages and assemblage art pieces for years, but the Mechanicals just grabbed my heart. They give you a wonderful collection at your fingertips. They're light, detailed, textured, and perfect.....period! I loved them at first sight.
The project I'm sharing today is special for me because... it is exactly who and what I am. I collect; I assemble; and I alter. This box centers around a Heart that's saved in a special Locket. The Gears and Wheels are always turning in different directions that create new interests. A Light goes on here and there that directs me to another idea and the Butterfly releases the creative momentum to fly. {see more}
Why Finnabair? :) She is a Mixed-Media Artist who works with many things... stamps, vintage pictures, metal ephemera, papers, beads, glitter and paints... things that call to me. She has the ability to put them all together into a project you can proudly call your own. A friend of mine years ago teased me when we were making cards. She said, "you always want to frame what you make." It's true. When I put days into creating a project, I want to put it on a shelf or hang it on the wall so I can enjoy it over and over again. Creating dimensional projects, like Anna does, is what calls me to my Studio. It's what I love. Finnabair gave me the platform to share my Art with the world, and for that I thank her from the bottom of my heart.
I first met/heard of Anna... at CHA 2012 and it was a real OMG moment for me. :)
My must have Finnabair product is... This may surprise you but it is
the Heavy White Gesso. I am a simple scrapper/creative and I love to create my
own backgrounds, most of which I monoprint, and at the moment I love to
use the White Gesso on black backgrounds.
The project I'm showing here today is special for me because... of 2
reasons: firstly, because I have created this background myself, using
one of my most favourite techniques of monoprinting, and then layering
up mediums with stencil patterns and hand carved stamps. I get so much
satisfaction from this process. And secondly, it features a photo of 2
amazing creative heArt friends. {see more}
Why Finnabair? :) Why not? LOL. Quite simply Finnabar and her range of
products are fabulous, and so perfect for my style of creativity, and
the quality is the best.
I first heard of Anna... accidentally while searching for mixed media art. I remember how amazed I was with her unique style and fresh ideas. At that time I have never even thought that I would be here today...
My must have Finnabair product is... I truly love all Finn's mixed media lines. It's hard to choose but my top three would be Heavy White Gesso, Art Alchemy acrylic paints and Gel Mediums!
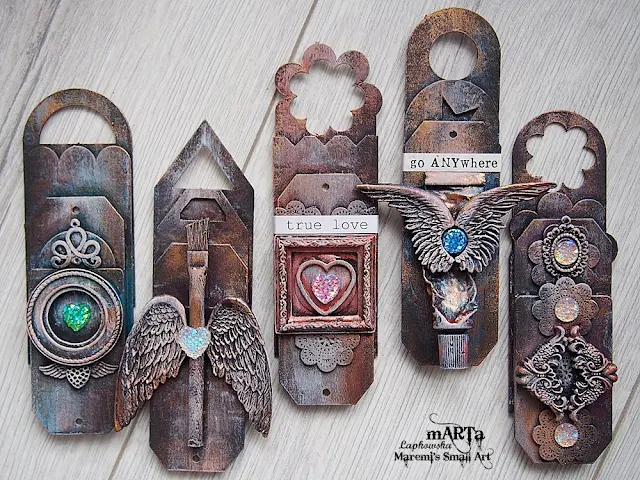
The project I'm showing here today is special for me because... it's my most favourite make from my 'Tiny Art' series. This piece was created for live classes that I will be teaching very soon. This project is very much me... very small forms, details and an intriguing composition. {see more}
Why Finnabair? :) She was my very first inspiration... Working for Anna was a dream that came true. :) And now being able to represent her brand as an Ambassador makes me really happy, proud and honored.
I first heard of Anna... right at the beginning of my scrapbooking adventure in 2010. I hope to finally meet her in person this November in Warsaw.
My must have Finnabair product is... well... everything! You can see it in my projects - I can't imagine my art without all the stamps, colors, beautiful metal embellishments and of course my beloved Ephemera vintage photos.
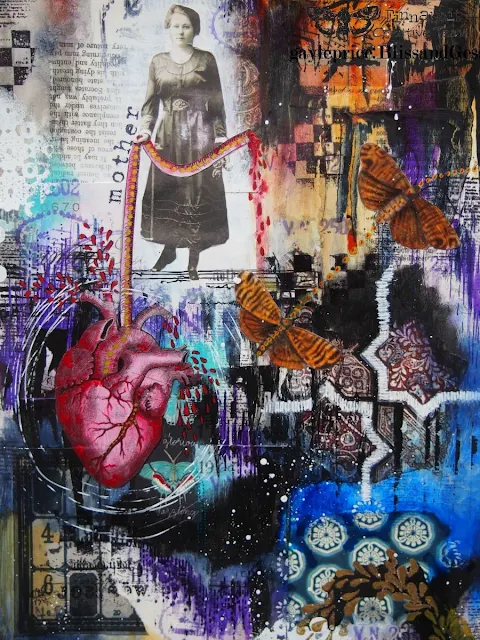
The project I'm showing here today is special for me because... I have put a lot of my time and feeling into it. While I was creating, stories were whirling in my head: of wars, separated lovers, lost home, but also hope for better times. It's a very special journal spread for me, so very close to my heart. {see more}
Why Finnabair? :) She is such an incredibly inspiring Woman and Artist. Her style influenced me a lot in my own art. Every time she releases a new collection or line of products, I get a feeling she was reading in my mind and creating these products just for my fancy. ;) I love her personality and this positive aura that surrounds her!
I first met Anna... I'm fortunate enough to have actually met Anna in person. I think the first time was in Sweden where I attended her workshops. She was (and is) amazing! So inspirational, so kind, so friendly. I urge you to go for the workshop if you ever have the chance - worth every penny and more!
My must have Finnabair product is... Ugh, such a hard question! I love her paper designs (nothing like any other), her embellishments (perfect for any craft) but especially the mediums. I guess I have to say 3D Gel as none of the dimensional pieces would be made without it!
The project I'm showing here today is special for me because... it's a part of a blog series me and my dear friend Marsha Valk are having. Every moth we choose a subject and use that as a jumping of point to our creativity. Please take a look in my blog with the tag "marsha" to find out more! {see more}
Why Finnabair? :) Why not?! She's such an inspiration, such an artist and such a sweet person, that naturally Finnabair!

