Monday, 6 October 2014

Black Gesso Magic

Hello, Friends!
Today we have another Creative Team showstopper!
Elena writes that her tags make a great addition to a gift but I would rather say they would make a perfect gift themselves! Just see for yourselves...


Hello,
today I'd like to show you two mixed-media tags I created using new Finnabair products.
This was the first time that I used black gesso and I have to tell you - it's amazing!


When creating these tags I used Silks paints from Luminarte. I used the Iridesсent line which shows the color best on dark surfaces - and here comes in the black gesso - it made just a perfect background for these paints and allowed to really show their true beauty!


The twinkle and shimmer on the tags look just unreally beautiful!
You really need to try out these two products together!


These tags are always nice to have in reserve as I think they make a great addition to your present!

If you'd like to see how the tags were created, I prepared a short video tutorial especially for you:


Products used:


p.s. In case you missed the latest news - there is a celebratory giveaway on my blog!
       It's only up 'till Tuesday midnight CET so don't wait and join us all to win the goodies and congratulate my Creative Team on their first month of creative adventure. :)

http://www.tworzysko.blogspot.com/2014/10/creative-team-september-giveaway.html

Saturday, 4 October 2014

Creative Team September & A Giveaway

Hello, Friends!
As you already know, September was a very special time for me. I had a huge privilege to present on my blog the beautiful art of a bunch of crazy talented ladies who agreed to support me in my creative adventure...


...and I really need to share with you the moment when our adventure began i.e. when the girls received their Finnabair boxes... :)


Just in case you missed any of their stunning creations, here's the recap {note that each project is accompanied by a video or a step-by-step tutorial}:

The Ladies went wild creative altering all sorts of objects:


Riikka's Music Inspired Guitar         Rebecca's Altered Shoes                        Marta's Altered Tractor


                                 Linda's Clock Frame                      and Monika's Journal Cover

We had some moving and very personal art journals pages -


                                                by Marta                         and Elena Smoktunova

And some more stunning and equally personal creations -


                                          Carole's layout                    and Elena Morgun's Canvas

Don't you think they did a brilliant job?!
I am over the moon happy to have the chance to be working with these ladies... Believe me when I say that every single Monday and Friday I am thrilled to share their talents with you all...

And that brings me to an announcement that will probably make you happy as well. :)
I feel that the first month of my Creative Team in action deserves a celebration, don't you?
That's why we are having a giveaway and here's what's waiting for you:


To grab a chance to win this selection of my products, all you have to do is to pin at least one of the photos of your chosen project of my Creative Team.
You can pin straight from my blog or you can visit our Pinterest board and repin from there.
Leave a link to your pin in the comments section 'till Tuesday October 7th (midnight CET) and I'll announce the lucky winner on Wednesday!

And one more thing...
on behalf of my Team and myself, we'd like to send a huge thank you to all of you who took the time and left some really touching comments on the blog and facebook. It really means a lot to us to know you appreciate their art... :)

Sending you lots of love,
{I can't wait to see what October will bring... :) }


Friday, 3 October 2014

Rusted Autumn Morning

Hello, Friends!
September was such a special time for me - I had a huge pleasure to have my Creative Team present their breathtaking creations with my new products and you must know that each time I felt moved and extremely excited to be having this bunch of amazing Ladies around me...

This is a good reason to celebrate so stay tuned and check my blog on Saturday to see the recap of last month's art and... a chance to win some goodies... :)

And today we have another unique project for you - just like Rebecca last Monday, Marta is proving that you can truly find the inspiration EVERYWHERE...


Hello crafty souls, it's Marta here today.
I have a great pleasure to share with you my project which I hope you'll find interesting.
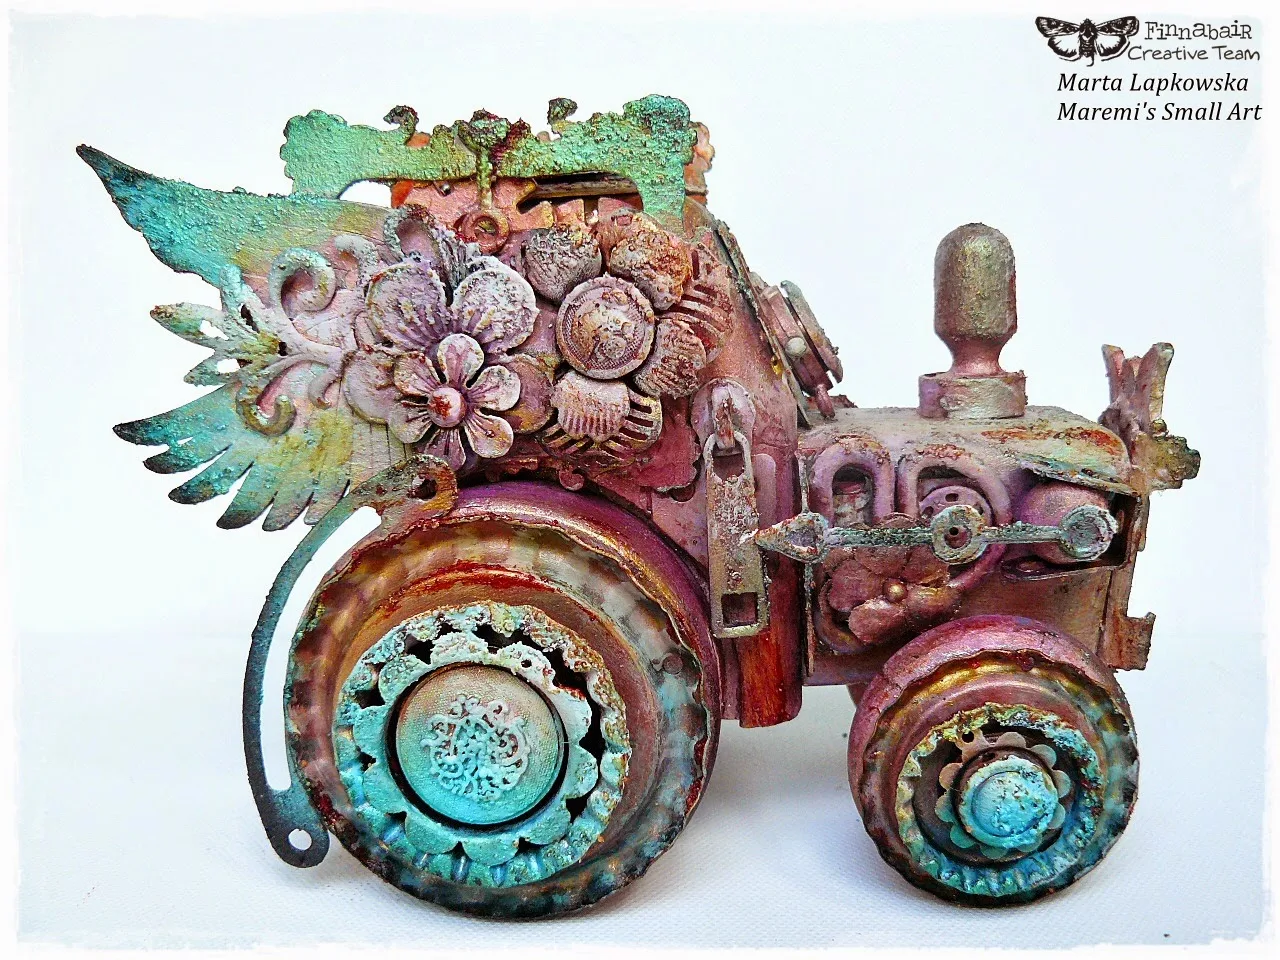
I created an altered tractor. Yes, a tractor, ideed! :)
I'm so excited to show it to you!
But first, let me show you a 'before' look...


For a long time I've been looking for a fun object to alter. I saw this tractor in a second hand store and I knew right away it was going to be turned into my art piece.
I had some sort of a vision in my head. I knew it was going to have wings for sure. :)


I don't think I was prepared for such an elaborate piece, though... :) I must admit I was doing it for a couple of days (nights actually). With heavy objects to stick, you need to allow some time to try. Doing both sides you need to make sure that the first part is dry before glueing the second one. It takes times to stick, dry, paint, dry then paint again and again... :)

The base was covered with heavy gesso. Then I added all the metal embellishments and wooden pieces and glued them with 3D gloss gel.
Then... colouring time.


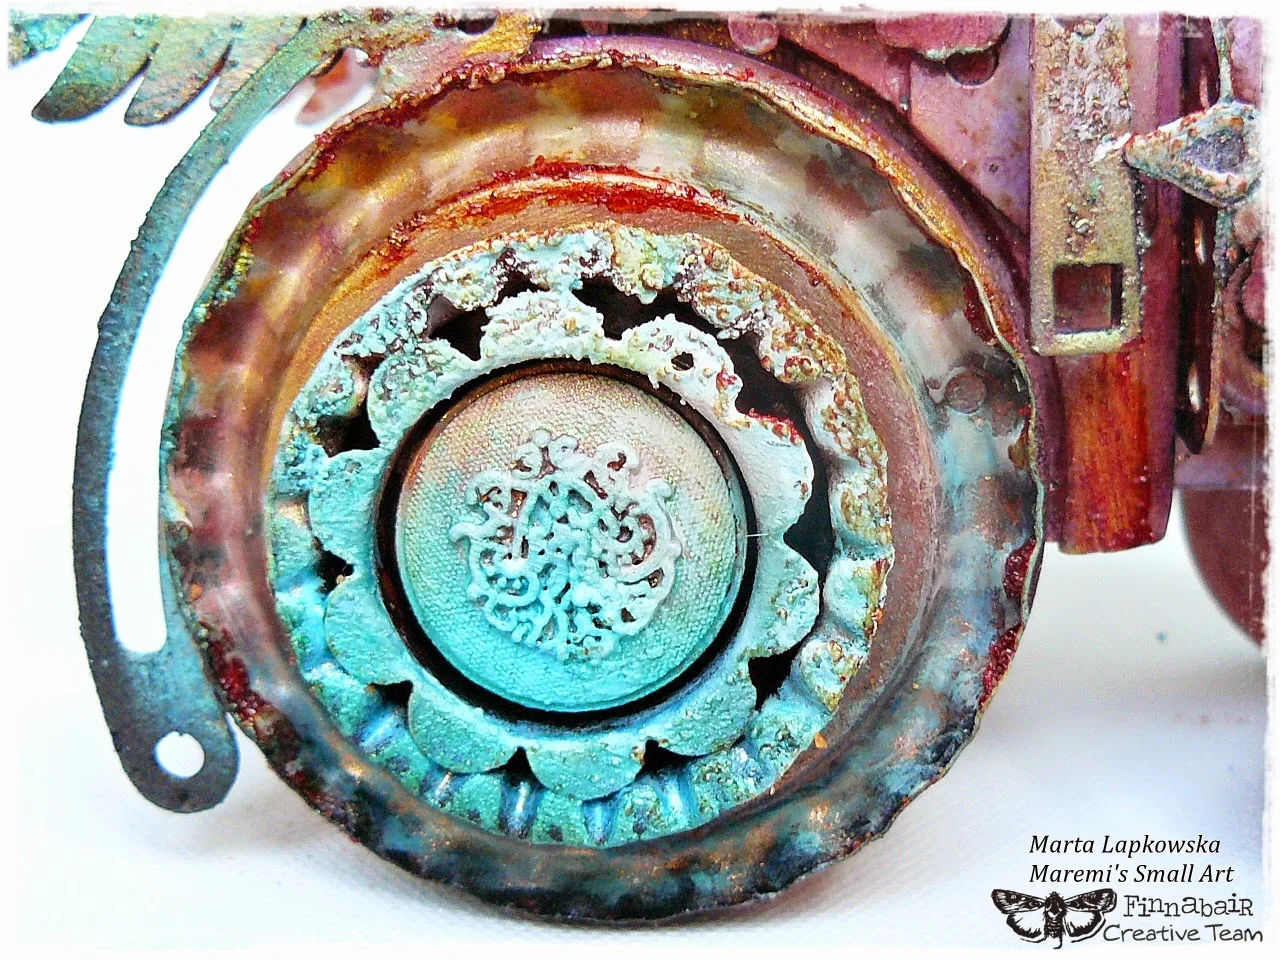
I was trying to achieve an old, rusty effect. I wanted to create a feeling as if this tractor was left in the rain for a very long time.
At the same time, I hoped to have some magical colour mixture. I used Lindy's Stamp Gang sprays and some Silks paints to colour it. When you look closer, you may see "a rusted frozen autumn morning feeling" which was the first impression of Riikka when she saw the project. 


In the video you will see how I created the rust. Mixing texture paste (white sand and graphite) with Lindy's magicals, this gave me some wonderful realistic looking corrode.


At the end, the whole projects was covered with gesso to outline some details.
Some of the metal elements are from my stash. I started to collect them some time ago. Once I heard Finnabair mentioning: "never throw away anything" and since then I started keeping some old zippers, buttons, pins etc. just in case. Even my friends know that.

I hope you will enjoy my creative process. I know that the video is longer than usual but I didn't want to skip any part to make sure that you can follow all up.
I enjoyed this work so much so I do hope you will enjoy watching it.


Hugs,
Marta

Wednesday, 1 October 2014

Art Recipe Wednesday: Autumn Landscape or poetry of disintegration?

Hi my dear friends - I hope you had a great week.
I was as busy as always (looks like I'm a master of filling my time right to the top or even over!) - teaching classes, organizing next events and planning projects, posts and activities for the nearest future... including Art Recipe for Wednesday of course!

This time I decided to  go bolder both with texture and color creating something a bit more abstract. I know how careful I have to be doing that as I am a huge fan of negative space and organizing elements into nice looking piles, groups and clusters and there is a risk I won't really like the final effect if I will go too crazy. To avoid the problem I decided to focus just on 3 main colours of the project - deep pinks, brown and green - with a bit of gold on the top.


Autumn feeling? Yes, please!
For me Autumn is pure the abundance of texture and colour: green changing into browns, reds, oranges, yellows - and smell of grass, soil and leaves...


There's some majestic beauty in this ending of the Summer, fading glory, hint of nostalgia and poetry of disintegration. Somehow - I could see these subtle emotions in the photo of one of my husband's ancestors  and that's how this page happened. Very accurate, I believe.
Is it possible the older I get the stronger I can feel this "autumn's vibe"?


You can see I used 2 different stencils and Light Paste to create part of the texture in my project - I just love the spongy, marshmallow effect it creates! Other elements are findings from my table top: some gems, Art Ingredients - glass beads (surely the leftovers from the pendant madness I was posting last week) and random leftovers of chipboard, veil resist canvas and fabric tape. Somehow - all that put together and colored with sprays, watercolor pencils and a bit of Inka Gold was able to create interesting, rich in layers and tones journal spread. (And no black this time! How is it possible?)

Anyway - here is Art Recipe for Autumn Journal Page 
and simple step-by-step tutorial for you! 


Step-by-step:

1. I've started priming the pages of my old book journal with 2 coats of Art Basics Heavy White Gesso. I like its thick consistence - old paper does not crumple that much when you brush it on. I dried one coat with heating tool and continued with second one. It is great medium to work on - it prevents your inks, paints and any other mediums from soaking in your surface.


2.  When White Heavy Gesso was dry I used first, more bold stencil and applied Art Basics Light Paste with palette knife on the chosen parts of my pages. I started adding layers of fabric tape, canvas, lace and glass beads right away - Light Paste (as well as Soft Gels, 3D gels and Modleing Paste) works great as an adhesive.Wherever needed I was using Soft Gloss Gel in a precise tip bottle to add more elements.


3. I dried my Light Paste with heating tool - it turned into white, light, spongy texture which reminds me marshmallows. I decided to create custom rich gold version of my Light Paste and use it with other stencil, to create more rich, interesting effect. I took 2 scoops of Light Paste into small bowl and added a bit of Silks - Acrylic Glazes: Solar Gold and and Ginger Peach. After mixing the color was deep and the shimmer looked just beautiful in my custom paste! I added one more - gold - layer on my project and dried it with heating tool. I was ready for spraying...


4. This time I was giving a test to my new Lindy's Sprays (Rusty Lantern Green and Van Dyke Sepia) and a bit of my favorite Black Orchid Pigment mixed with water - but you can surely replace Lindy's with Wild Vine and Autumn Butternut and get very similar effects! I added my photo, some embellishments - a bit of crystals and cogs I found in one of my boxes and add some final spraying...


5. When the pages were dry I  wanted to add some finishing touches to the color: I used my watercolor pencils (Royal Talens) but I didn't  touch them with water at all. Adding a bit of color here and there was enough to add more balance to the page - I focused mostly on green and dark pink outlining the texture done with paste and stencil or adding more definition to the colors.


6. Finally I added the finishing sparkle to the page rubbing a bit of Inka Gold (Green and Gold) on my beads, lace and embellishments. After 5 minutes my journal page was ready!


Here are products from our Mixed Media Place Store listed for your convenience:


I hope  this page will inspire you a bit to play and create your own version of pastes and gels - and to play a bit more with texture and color!

Sending warm Autumn hugs

Related Posts Plugin for WordPress, Blogger...