Thank you for joining us and creating fabulous projects! We are happy to announce the winner of our May Art Recipe.
May Art Recipe
The winner of our May Art Recipe is scrapnelli with this project:
Amazing shading and stamping effect!!
To the winner: you are invited to be our Guest Designer and you win Finnabair products pack so please write an e-mail to us at artmail@finnabair.com to establish all details :)
To all participants: thank you so much for playing with us! And if you feel similar to us regarding the winning project, please leave some love under this blog post in comment section.
Also please remember, that new challenge is still open and the rules are simple: you need to stick to the colour palette and use at least 2 of the products listed in a challenge.
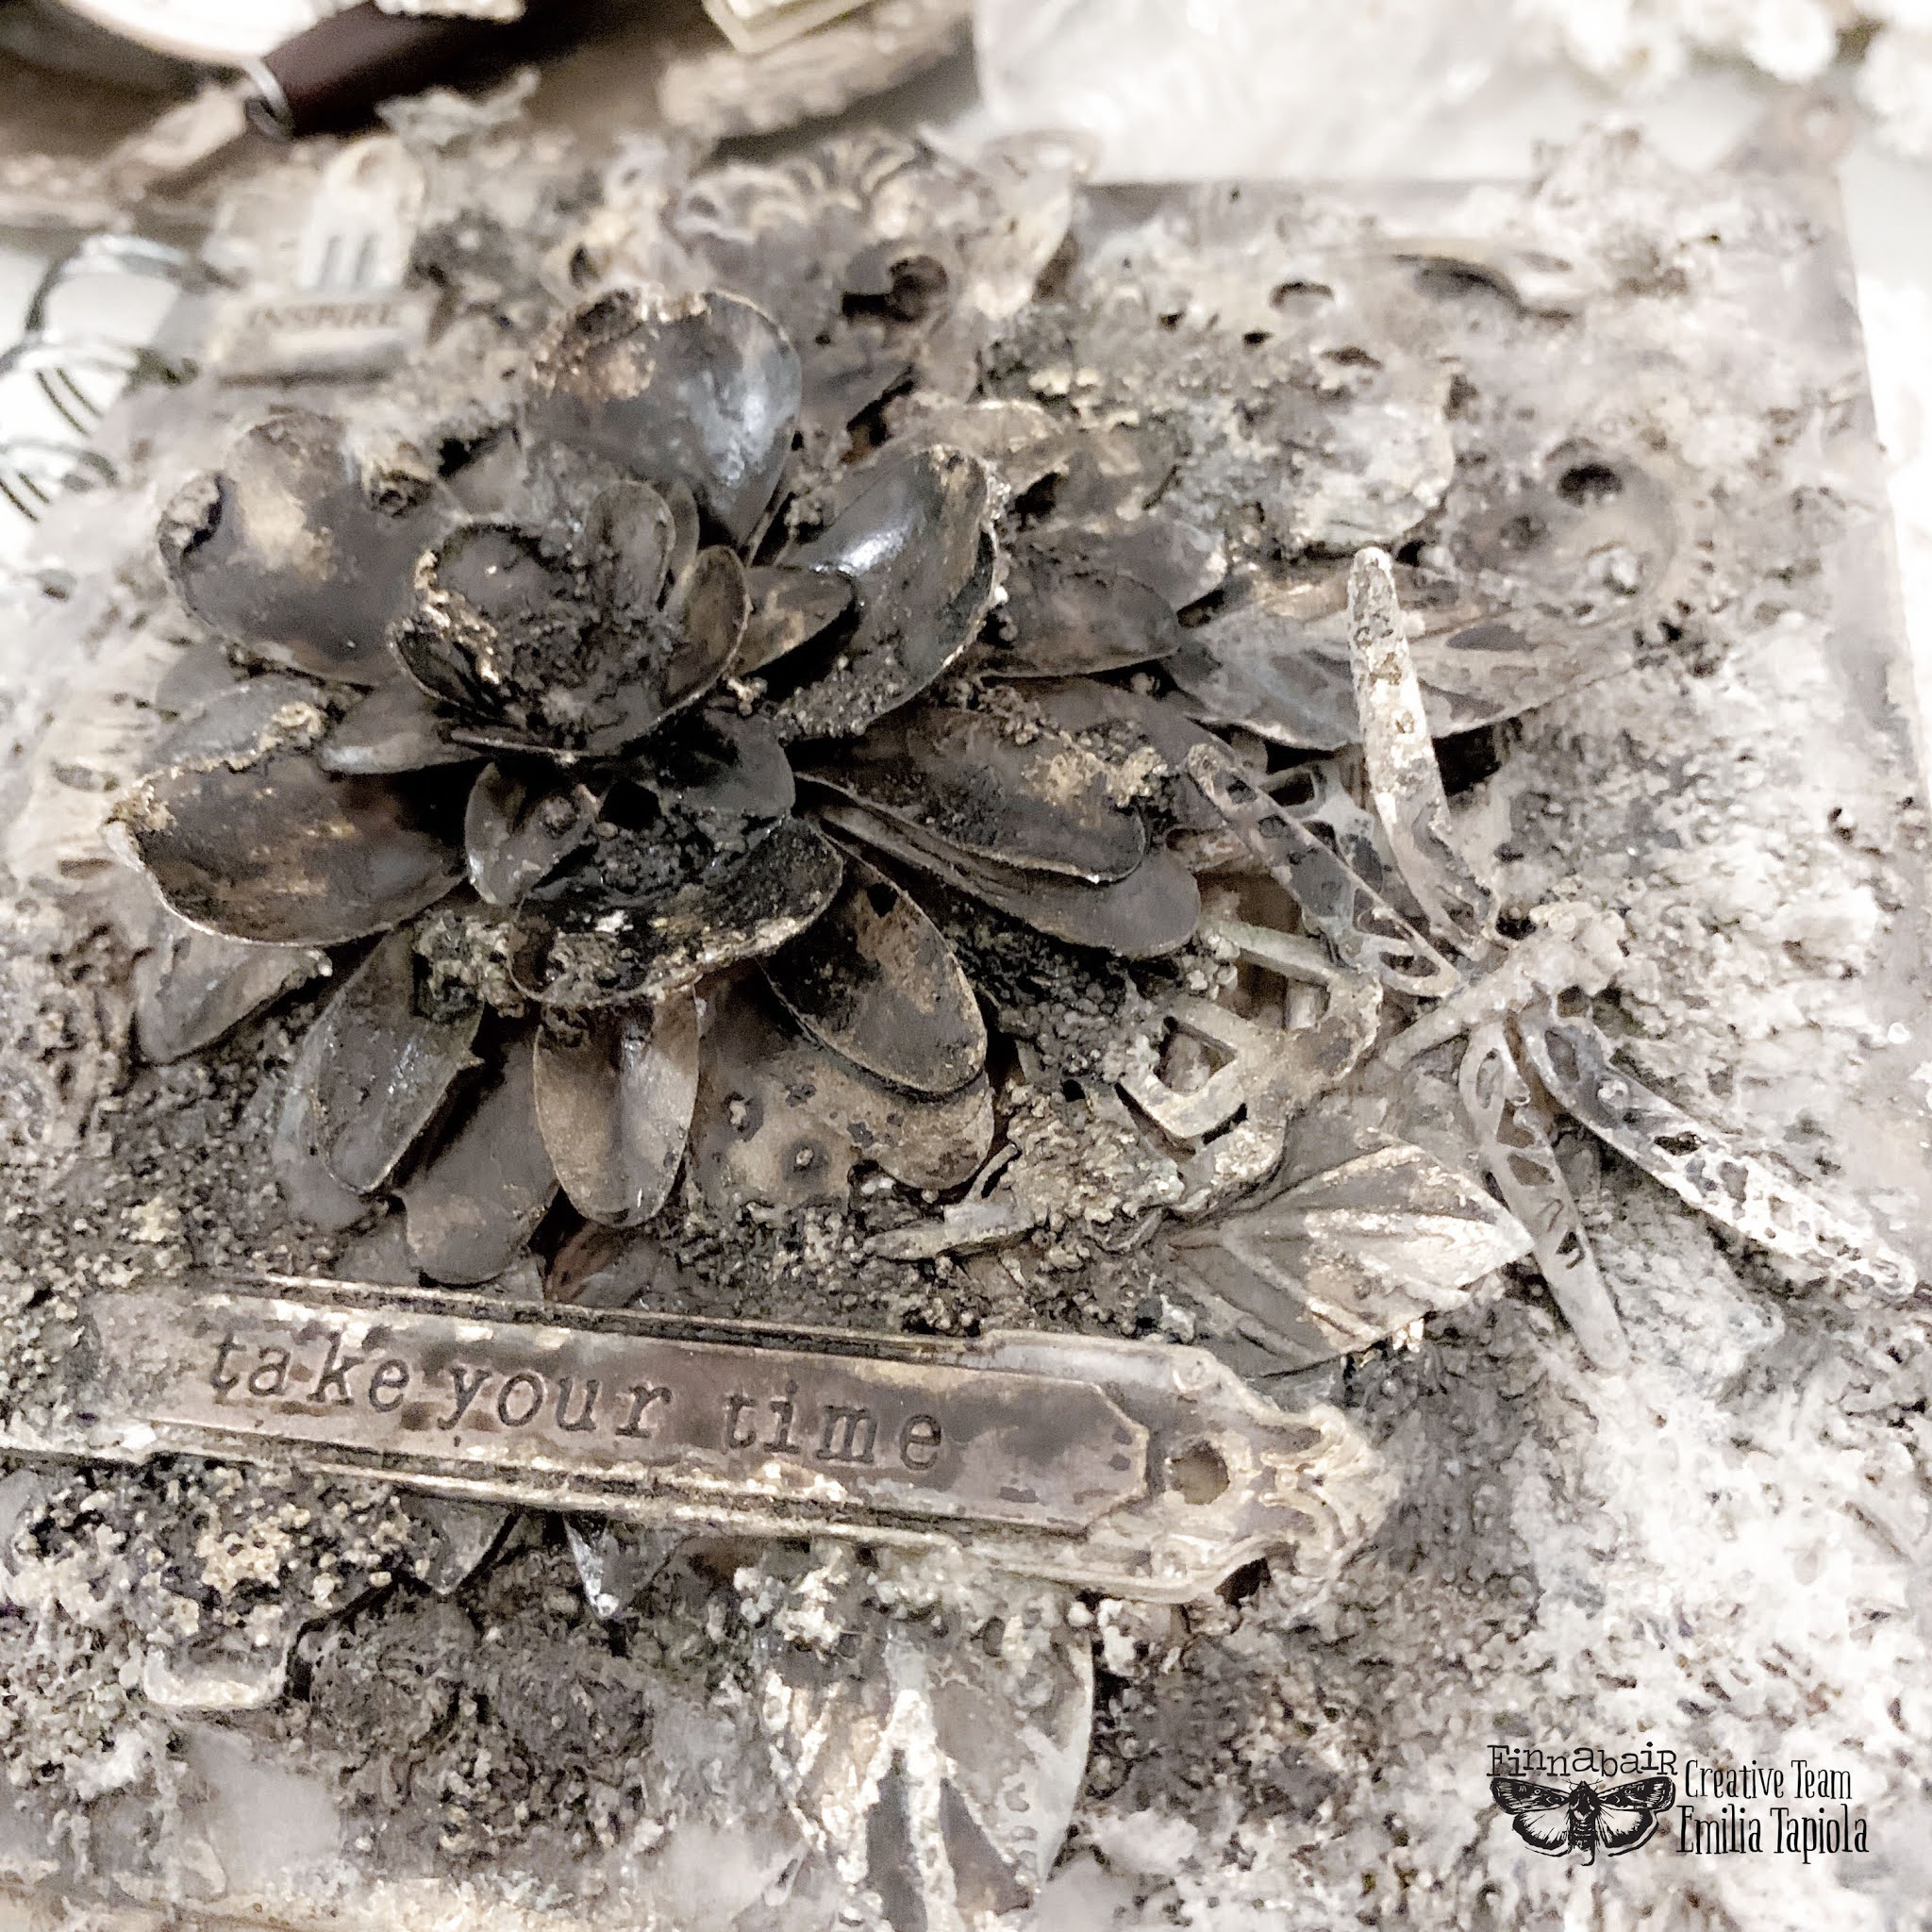
I want to share my Quiet Moments with you. It’s a journal I have recently started, to capture those precious, still, quiet, little moments in life that may not at first seem much, but when you actually stop and see, are actually everything.
In other words, my Quiet Moments journal is one that I pour my soul into, using whatever inspires me right there and then. It’s a nature journal of a sort, as I love using dried and pressed plants I have collected from our own garden. So, I thought the cover needs to reflect the concept of the journal and wanted it to look as natural as it can be, something lost and found in the forest.
The journal itself is a Finnabair Art Daily Square Journal, 5.5 inches, 14cm in size. I had no clear vision in mind when I started decorating the cover, as I wanted it to be just like the inside; made with love and care, listening what my heart wants to say. So, I just picked some inspiring elements and started. You can see the entire process in my video, from start to finish, how I started layering and picking colours and so on, intuitively and slowly building the look I was after. One thing I knew from the start was that I wanted the cover reflecting life with its full beauty: the light, the rough darkness in one harmonious balance.
So, I started with attaching some jute cord ribbon with Soft Matte Gel into the background to give it roughness to start with, and then primed the cover with Heavy Gesso.
Then, I started to arrange the composition. I wanted to include some familiar elements I love and am always using, like ripped old cardboard pieces, lace I have dyed myself, using plants and flowers from our own garden, but I also wanted to use the inspiring, new Finnabair Winter 2021 Release products.
I layered some lace and cardboard to make the background and added a broken clay frame piece from the new Grungy Frames mould that I had managed to drop to the floor and break. I thought it’d make a beautiful detail and underlines the thought of my journal; everything has beauty in it. For me, broken pieces are usually the most beautiful and meaningful, so I wanted the broken frame to have a prime spot.
I attached everything with Heavy Body Gel and as I wanted some roughness in there to resemble moss, I added some White Sand Texture Paste and Mini Art Stones to the cover, too. Then, I primed everything with Heavy Gesso.
I wanted the cover to look mossy and tattered, like it has been left into the forest for ages, so I tried to imitate that with my paints. I mixed Impastos Snow White, Pitch Black, Burlap, Linen, and Dark Chocolate and used brush and baby wipes to blend the paints to the cover.
Next, I added some shadowing in form of Liquid Acrylics Burnt Sienna, Ink Black, Umber, Ochre, and Avocado Green.
I also thought that where there is darkness, there is also light, so I used the new Gold Metallic Flakes to give some warm glow to the composition. Using Gilding Glue, I attached just a hint of gold flakes here and there. Then I gently added some new Sage Leaves Matte Wax on top of the gilding, as it is just the perfect shade to make the gilding gold look more aged and worn.
And my Quiet Moments cover was finished. You can follow the whole creative process from start to finish in my long video, where I explain in detail what I am doing and how and why and guide you through the whole intuitive crafting process, sharing my thoughts about quiet moments and life along the way.
Wishing you glimmering light and peaceful, quiet moments,
Emilia
List of supplies with active links to Mixed Media Place store:
As each month our Brand Ambassadors show up on the blog to inspire you. This month host is Linda M. Cain with theme "Vintage found objects elegance". Linda, Riikka Kovasin and Karolina Bukowska created beautiful projects, that you can see below.
Hi everyone! Hope you’re all safe and well. June is my month to choose a theme for the Brand Ambassador’s post. Since I love everything vintage, and there’s so much elegance in the products from Finnabair, I chose “Vintage Found Objects Elegance.” I hope you enjoy.
This is a 6”x6” wood canvas that I turned over and covered with tissue paper using 3D Gloss Gel. I used the Celestial Music tissue paper over the entire canvas. Along the outside edges I added White Crackle Paste with the Flourish stencil. The front edges are stenciled with the gorgeous Mermaid Effect Paste and the Vintage Wallpaper stencil. I added a bit of black and brown archival ink to the edges, and some watered down Carmine Liquid Acrylic paint to the sides.
My vintage found objects include the large skate key, and a cabinet door handle. I used tiny glass vials with tissue paper for labels sealed with gold sealing wax. The metal corners, watch key, and ruler pieces were from my stash.
I had a vintage picture and a frame from my friend Jen Crossley that worked perfectly together for the focal point. The flower and leaf mechanicals were dusted with several colors of Finnabair waxes until I was happy with their appearance. Rhinestones give them a little bit of color and sparkle.
All the ephemera are glued in place with 3D Matte Gel. The last thing added was a mixture of micro beads and glass glitter in the recessed corners of the frame. I love to save and mix these in little containers just for projects like this one.
Products I have used - all the images linked to Mixed Media Place online store:
What a marvelous theme! I could have chosen a variety of different items for “vintage found objects elegance” theme, but I had been wanting to do something to this tin for quite a while, so I used this theme as a motivator to get me going. Although I must be honest, the tin is not actually that old. I bought it from a store not that long ago. But it could have been a vintage tin! I just haven’t had the luck to find one yet.
To turn my tin a bit older looking and thus better fitting to the theme, I treated the exterior with hints of mediums. I dulled its shine using wax and Impasto paint. I also added just a teeny hint of rust effect paste to the edge to give it more age.
The bigger elegance (I hope) and treasure is inside the box. Inside you can also find actual found items like the little light bulb, a coin and some sewing supplies. The deer is something I have had in my stash for a while now. I think it is from my mother’s treasures – she used to collect miniature things. I have a faint recollection though that I’ve removed the deer from a souvenir plate of sorts and just stored the deer. But anyhow, that was my jumping off point for the “nighttime in the woods” scene inside. While the right side is the woods, with the fern mimicking trees and a Mélange pebble playing the moon, the left side is more of a collection of items. I did use leaves and flowers there, too, to keep the inside cohesive, but it’s not a woodland scene as such. The text strip says: “Well, I do see it. Are you coming?”.
As the inside was a magical golden deer in moonlight, I painted the tin black using black gesso. I then made the composition using Heavy Body Gel as my adhesive and after drying painted those elements black, too. I then mixed different blues to get that inky night feel and added golden and white splashes to represent stars. There is also some glitter paste to mimic ground, glistening dew drops or fireflies.
I really enjoyed making this little piece and now I crave to do more! Maybe I need to purchase a couple of more tins…
Products I have used - all the images linked to Mixed Media Place online store:
Collecting is my addiction, everything will come in handy…. today I have confirmation of this!
Altered juice bottle. I chose simplicity, using Impasto, Liquid, Texture paste, Cracking paste, Heavy Gesso white and 3 D Gloss Gel.
You can see the entire creation process in the tutorial.
Products I have used - all the images linked to Mixed Media Place online store: