Hello Friends!
Don't you just love the title for today's post?! So many of us create art (in its beautiful variety) to express ourselves and to make our individual mark with paint, paper, glitter and glue. :)
Don't you just love the title for today's post?! So many of us create art (in its beautiful variety) to express ourselves and to make our individual mark with paint, paper, glitter and glue. :)
Gayle invites us again to her own unique beautiful world of art journals... Enjoy every step she shares!
Psssst...! I hope you didn't miss the exciting news this week! ;)
Psssst...! I hope you didn't miss the exciting news this week! ;)
* * * *
Hello lovely Finnabair friends.
This month I’ve created a
double art journal spread, playing with visual elements and techniques
that I really love to explore: faces, pattern and collage.
Stencils used with Gel, Pastes and Inks along with stamps and collaged papers have been used to create pattern.
Stencils used with Gel, Pastes and Inks along with stamps and collaged papers have been used to create pattern.
The colour comes from Finnabair
Impasto Acrylic Paint and the little hit of gold from Finnabair’s
beautiful “Sparks” Acrylic Paint.
This is what I did…
No.1 Apply Heavy White Gesso to journal pages.
No.2 Use 3D Matte Gel through the Checker Stencil. I used Gel here instead of Texture or Modeling Paste as I wanted the pattern (the little squares ) to show up white, and resist rather than absorb the paint that was going to be the next layer.
No.3 Finnabair’s fabulous new heavy body matte acrylic Impasto paints are the best for creating rich deep opaque colour, but they can also be used diluted with water to create soft, translucent layers of colour similar to watercolour but with the added bonus of being waterproof and therefore will not react with other wet medium that is used on top of it.
Here I placed a tiny bit of
Impasto paint into a small spray bottle. I filled the bottle about half
full of water, gave it a really good shake and applied the colour as a
mist to my page.
No.4 First I just lightly misted my pages
with water then sprayed on the acrylic colour.
Where the paint sat on
top of my stenciled white squares it was easily removed by wiping over
it with a baby wipe.
No.5 Add some more pattern and texture by using White Crackle Texture Paste through Harlequin Stencil. Texture Paste (unlike Gel Medium) will absorb and hold any paint or ink that may be applied to it in subsequent layers.
No.5 Add some more pattern and texture by using White Crackle Texture Paste through Harlequin Stencil. Texture Paste (unlike Gel Medium) will absorb and hold any paint or ink that may be applied to it in subsequent layers.
No.6 Image transfer of faces using Soft Matte Gel. Using this gel works every time. And yes, you can image
transfer over the top of Texture Paste and 3D Gel Medium to add
interest, pattern and texture to your transferred images.
No.7 Rubbing away the top layer of paper to reveal the photo copied image, now a part of my page, and the beautiful, misted acrylic paint layer showing through underneath.
No.7 Rubbing away the top layer of paper to reveal the photo copied image, now a part of my page, and the beautiful, misted acrylic paint layer showing through underneath.
No.8 All 3 images transferred.
The bottom lip of the large image on the left did not transfer because I
did not put enough Gel Medium onto the paper, but one of the reasons I
love the look of this technique is it’s “imperfection” and the very
soft edges that are created.
So
far I have created my background, some textures and my focal points.
Now I would like to add some collaged pattern and I have been inspired
by a wonderful collage artist called Anne Bagby who makes all her own
collage papers and used them with her beautifully drawn faces and
figures.
No.9 Soft Matte Gel mixed with Gold Mica Powder.
No.10 This Mica coloured gel is then used through the beautiful Finnabair Doily Stencil (still my favourite) onto black paper.
No.11 Some “hand made” collage paper.
No.11 Some “hand made” collage paper.
No.12
Using the same Doily pattern, but on a Cling Stamp, I stamped onto
white tissue paper, so creating some more “hand made” paper to collage
onto my pages. Also added some deeper colour with Impasto acrylic
paints.
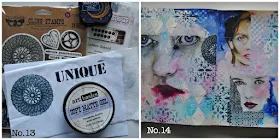
No.13 More stamping onto tissue paper using Finnabair’s beautiful 'Trust the Magic' set of stamps and a 7 Dots Studio Letters Stencil.
No.13 More stamping onto tissue paper using Finnabair’s beautiful 'Trust the Magic' set of stamps and a 7 Dots Studio Letters Stencil.
The images on the tissue
paper get cut out and then collaged onto my pages using Soft
Matte Gel.
No.14 Once glued down, the white tissue becomes
totally transparent. Adding a “stamped” image in this way (onto tissue
paper first) gives you a lot more control over where you want the image
to be, how much you want to see of it and it also moulds itself into
rough and textured surfaces giving really good coverage.
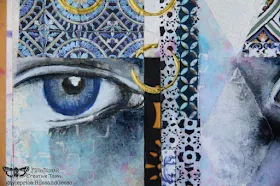
No.15 Hand made and other patterned papers collaged down to frame the faces.
No.15 Hand made and other patterned papers collaged down to frame the faces.
Some extra colour added to lips and eyes but I love the way that very
first layer of misted acrylic paint comes through from underneath.
No.16
Using the cap off of a misting bottle and dipping it into some
beautiful Dragon’s Eye Sparks acrylic paint to add a final touch.
I don’t think you can ever have too much colour, pattern or texture on a page.
I don’t think you can ever have too much colour, pattern or texture on a page.
Try using your patterned stamps and stencils on different kinds of
paper and then tear or cut them up to use as collaged elements on your
projects and in your journals.

We are all unique and individual and no matter how you choose to make your “mark” on your pages, whether it be by freehand drawing, by using stamps, collaging images, stencils, brushing on paint or letting inks splash and dribble, that is unique to you and no two people will do it the same.
Explore and exploit the
possibilities of your art mediums, enjoy them and have fun with them.
Love, Gayle xx
Products used:


Wow Gayle - this is awesome! I just love everything about it - all those layers... sigh.... xxx
ReplyDeleteGayle....you are an absolute master at this and this layout is stunning!!! Excellent tutorial ❤️❤️❤️
ReplyDeleteAbsolutely stunning!
ReplyDeletePure eye candy!
ReplyDelete