Strony

Friday, 30 March 2018

Brand Ambassadors Faves

Hello Dear Friends.
Let me invite you to another inspiring meeting with my talented Brand Ambassadors!
This month I asked this bunch of creatives about their favorite projects, products and techniques that they either discovered for themselves or particularly enjoyed so far this year.
As always - they are sharing their stunning art and thought-provoking stories. :)

Please enjoy all the beautiful artworks!


LINDA

I have to say, I'm hooked on redecorating empty bottles, and this is my favorite creation this year.
After starting an altered bottle at a recent retreat, I came home and added my touch to make it sparkle... literally. We were told to have a theme in mind before we came, and mine, of course, was using Mechanicals and Finnabair Metallique paints.

I started with a layer of Heavy White Gesso that is key to this project. I had created some paper clay molds a few days before so I could glue them on nice and dry at class.
We basically got a start with the decorating, and then took them home to finish up.
I added a mixture of Micro Beads and Glass Glitter around the mould, two different trims, several layers and colors of Metallique paint, and the finishing touches of Art Alchemy Waxes.

The cloth trim really stands out with a bit of 2 colors of paint, and a darker shade of wax. The edges of the moulds and the bottle rim, are defined with wax.
The Mechanicals (Grungy Butterfly and Vintage Snowflake) are painted and glued in place, as are most of the elements, with 3D Matte Gel. They will not come off, believe me.
The Beads and Glass Glitter are added with Soft Gloss Gel.
The chain and charms are added as well as the topper that Christine taught us to make.
Just keep adding or painting over until you find the combination of colors and accents that work for you. I hope you find an old bottle of your own and make it a new creation. I'm on a roll. See more on my blog!


RIIKKA

This project is a special one for me as it's done for my friend Keren.
She collects altered brushes from her friends and I've failed her twice already by giving away a brush I have made before she could have it. So now I made sure she will get one and made this brush especially for her! 

My inspiration for this were the Art Alchemy Waxes.
I just love to use them on dark surface and thus painted the brush with Black Gesso after making the composition.


I first added quickly some blues with Art Alchemy Metallique paints and then added golden and turquoise touches using the Waxes.
After adding these colors the brush it started to resemble something out of the One Thousand and One Nights tales so I added a golden moon to the back as well. I hope Keren will like this!
Although I like how this project turned out and even more how I'm at least able to send Keren something, it's not my favorite project I've made this spring. :)

Unfortunately I can't reveal the favorite one yet, but here's a little sneak of it. If you want to see the whole thing, please visit my blog after April 10th.


KASSA

I thought I'd tell you about one of my favourite techniques of this year.

Well, to be truthful, for as long as I can remember my go-to technique has been the simple pleasure of finger painting. :)

So I thank my lucky stars that the Art Alchemy range introduced the Impasto Paints...


These thick textured paints are a gem to mash, merge and blend with your fingertips. As you can see, my favourite technique is as simple as it gets, not to mention it's huge fun! :)
Additional bonus: your fingertips are a work of art at the end of the session too. :)


KEREN
I'd like to share with you one of my favorite projects this year.

I created an altered bottle using Impasto Jade Paint and Red Rust Paste  from Finnabair.
I love the patina effect you can create with just these two products.
Adding the Art Alchemy Metallique Waxes as a finishing touch adds the perfect highlights to alter any project.
Feel welcome to watch my video with a step by step tutorial!
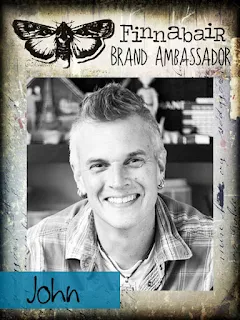
JOHN

Speaking of faves, I am indeed OBSESSED with the new Plaster Paste! I fully admit that since this product was introduced in January, I’ve been using it on almost every single project that I’ve been working on.
If you follow me on Instagram (artnewwave), you’ve already seen some of the amazing textures that I’ve been creating for mixed media backgrounds on a variety of different projects.

Why do I love this product so much?
It’s an easy way to add texture to almost any surface, and it dries very quickly with a heat tool.
And more importantly, you can add an insane (no exaggeration!) amount of water and other liquids layered on top and it won’t loose it’s form or shape like some other texture pastes.
I’ve been experimenting with washes lately, involving a lot of water as the base for mixing with acrylic paints and Mica Powders to create multiple layers of lighter density colors and the Plaster Paste is the PERFECT medium as a base for projects.
*   *   *   *
Aren't these Artists amazing?! 
We would love to hear from you about your own discoveries and art adventures in 2018.
Leave a comment or drop by our Finnabair & Friends facebook group!

Happy creating!
Finn & The Team

Monday, 26 March 2018

Collect Beautiful Moments

Happy Creative Monday, Everyone!
Tanyalee's sharing a great tutorial how to make your own little journal from scratch. You'll see how easy and fun it is to create!
And like always - the possibilities are endless and you can take Tanyalee's creative tips and use them with your favorite colors and your own style.
What will you put into your own little journal this week? :)

*   *   *   *

This month my tutorial for you is using Finnabair’s Resist Canvases and I am going to turn them into a journal and then decorate the cover.
I selected two resist canvas sheets and cut them down to 6x12 inch pieces so that when they fold in half they will make a 6x6 inch journal.
I also added some plain white cardstock for extra pages and to back the resist canvas sheets.

For the cover I sewed to pieces of canvas together using a simple running stitch. I was going to machine sew them, but my old sewing machine just didn’t want to do that. It has new entered it’s final resting place I’m sad to say.
Once the cover was finished, I backed the remaining canvas with cardstock by glueing the sheets together.
I then constructed the journal using a piece of ribbon threaded through two holes in each sheet and tying it off.

I started the cover by adding a stencil and some Paper Paste through the 'Doily' stencil.
This created a lovely extra textural space to the cover, but I ended up covering it up with gauze and decorations in the end. :)

The gauze added texture as well and gave the paint something to soak into and added visual appeal.
Next I used the dabbing brush with some Metallique paint in Romance Pink and Soft Satin.
I wanted it down in place to allow the resist elements on the canvas to really stand out.
Once the background was painted I started placing the ephemera pieces so that they created an interesting montage, but didn’t end up too bulky so the journal was still workable.

I coloured the cover more with Mica Powders and added Mini Art Stones and Micro Beads.

As a finishing touch I added some text and rubbed Metallique Wax in Rose Gold over the edges of the journal and the Mechanicals pieces.
Please enjoy my video and see step by step how I created my little journal.


And that concludes my journal making tutorial.
Have you ever made your own journal?
If so, I’d love to see them, tag me on Instagram, I’m @tanyaleekahler, so I can see them.

Yours in messiness


Products used:

Friday, 23 March 2018

Tell The Story

Hello Friends!
It's another inspiring Friday with my Creative Team!
Sanda is here with her brand new stunning artwork and today she's telling a beautiful visual story (something I love doing myself!).
There's a video tutorial and lots of tips from Sanda so I'm sure you'll feel inspired to join her and create something special this weekend!

*   *   *   *

“Stories, like people and butterflies and songbirds' eggs
and human hearts and dreams, are also fragile things”
― Neil Gaiman

Hello, dear friends,
I am sharing with you today a mixed media collage/assemblage titled “Tell the story”.
My inspiration was sparked by some lovely old photos from Finnabair and three small tea light holders I had laying around on my table. I just love old photos and the stories they tell…
So I created a kind of vintage with a twist look project to compliment these wonderful Ephemera pieces.
After I gessoed a piece of MDF and dried it with my heating tool, I pulled out one of my favourite Finnabair stencils (the 'Harlequin' one) and I drew and shaded with a 2B mechanical pencil.

Next, I spread through a different stencil a generous layer of Paper Texture Paste (this is one of the most gorgeous texture paste ever to work with!!!), using a silicone brush. I dried this layer thoroughly with the heat tool.
For my first layer of colour, I chose two Art Alchemy Impasto paints (Cobalt and Black) and mixed them until I got a wonderful, rich and deep turquoise-blue.

After spritzing some water, I applied my paint with a brush, spritzed more water and tilted my board, to help the paint move and drip. With some baby wipes, I removed the excess.
I dried everything again and then, I glued down three recycled tea light holders using Heavy Body Gel and left it dry for a couple of hours.
For my next step, I sponged some Heavy White Gesso – this is one of my favourite techniques when I apply gesso. I simply love watching how the gesso catches the texture underneath, helping it to reveal itself in all its glory. 😊
I worked the gesso more towards the edges, as I wanted to keep the concentrated colour in the middle of my panel.
I created another layer of texture using Art Stones that I adhered with 3D Gloss Gel.
I left the panel dry completely and then I added more texture and colour using Rust and Patina Pastes. Do I need to tell you how much I love them? :)
I applied the pastes going from dark to light, using the new dabbing brushes (they are fantastic!).

TIP: To ensure you never have problems with your Rust and Patina Paste, like drying in the jar, when you work with them, try scooping out of the jar the amount you need and close the lid back immediately. You can always go back and scoop some more.
Sshhh, don’t tell anyone, but sometimes I forget my own advice too! LOL
To bring everything together, I sponged another coat of gesso.

Next, I added some subtle background stamping, using the 'Old Town' and 'Dirty Walls' sets and a few embellishments (wire, two air dry clay birds, rub-on transfers, a word sticker, two Finnabair Ephemera pieces and a few Mechanicals).
As a finishing touch, I painted all the sides with the same mixture of Cobalt and Black Impasto paints and with the leftovers, I did some splatters.
Here is my video where you can watch my creative process and see the products I used.
Enjoy and have fun!


I hope you’ll get inspired by this project and try some of the techniques in your artwork.

Have a lovely day, my friends,

xoxo


Products used: